리눅스 / 사용자 / 사용자 조회, 사용자 추가, 사용자 삭제, 사용자 수정
사용자 조회
- 모든 사용자를 출력합니다.
# cat /etc/passwd
root:x:0:0:root:/root:/bin/bash
bin:x:1:1:bin:/bin:/sbin/nologin
daemon:x:2:2:daemon:/sbin:/sbin/nologin
adm:x:3:4:adm:/var/adm:/sbin/nologin
lp:x:4:7:lp:/var/spool/lpd:/sbin/nologin
sync:x:5:0:sync:/sbin:/bin/sync
shutdown:x:6:0:shutdown:/sbin:/sbin/shutdown
halt:x:7:0:halt:/sbin:/sbin/halt
mail:x:8:12:mail:/var/spool/mail:/sbin/nologin
operator:x:11:0:operator:/root:/sbin/nologin
games:x:12:100:games:/usr/games:/sbin/nologin
ftp:x:14:50:FTP User:/var/ftp:/sbin/nologin
...
- root과 useradd 또는 adduser를 통해 생성한 사용자 계정을 출력합니다.
# grep /bin/bash /etc/passwd
root:x:0:0:root:/root:/bin/bash
jb:x:1000:1000:JB:/home/jb:/bin/bash
사용자 추가
useradd
- jb 사용자를 만듭니다.
useradd jb
- 사용자 홈 디렉토리도 같이 만들고 싶다면 -d 옵션을 사용합니다.
useradd jb -d /home/jbdir
- jb 사용자의 비밀번호를 만듭니다.
passwd jb
adduser
- adduser 명령어로 사용자를 추가할 수 있습니다. useradd와는 달리 사용자 홈 디렉토리를 자동으로 만들고, 비밀번호 설정 등도 한 번에 할 수 있습니다.
# adduser jb
Adding user `jb' ...
Adding new group `jb' (1000) ...
Adding new user `jb' (1000) with group `jb' ...
Creating home directory `/home/jb' ...
Copying files from `/etc/skel' ...
New password:
Retype new password:
passwd: password updated successfully
Changing the user information for jb
Enter the new value, or press ENTER for the default
        Full Name []:
        Room Number []:
        Work Phone []:
        Home Phone []:
        Other []:
Is the information correct? [Y/n]
사용자 수정
- jb 사용자의 uid를 1001로 변경합니다.
usermod -u 1001 jb
- jb 사용자의 홈 디렉토리를 /home/jb-home으로 변경합니다. 이때 /home/jb-home는 수동으로 생성해야 합니다.
usermod -d /home/jb-home jb
- /home/jb-home을 생성하고, jb 사용자의 홈 디렉토리를 /home/jb-home으로 변경하고, 파일 등을 이동합니다.
usermod -m -d /home/jb-home jb
사용자 삭제
- jb 사용자를 삭제합니다.
userdel jb
- jb 사용자를 강제로 삭제합니다.
userdel -f jb
userdel --force jb
- jb 사용자와 함께 사용자 디렉토리, 사용자 메일함도 삭제합니다.
userdel -r jb
userdel --remove jb
기타
- jb 사용자가 속한 모든 그룹을 출력합니다.
groups jb
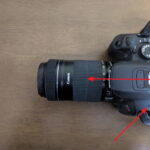
렌즈의 특성은 여러 가지가 있어요. 렌즈 이름에 그 특성이 표현되어 있죠. 그 중에서 초점 거리에 대해서 알아봤어요. 예를 들어 EF-S 18-55mm F4-5.6 IS STM 라고 하면 18-55mm가 초점 거리에요. 렌즈마다 초점 거리가 다른데, 초점 거리가 변하면 무엇이 달라지는지 정리해보겠습니다. 초점 거리 우선 초점 거리가 무엇인지 알아야겠죠? 그런데 이게 좀 어려워요. 자료마다 용어, 표현, 의미가 ...
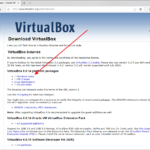
버추얼박스(VirtualBox)는 오라클이 제공하는 오픈소스 가상화 프로그램입니다. VirtualBox is a powerful x86 and AMD64/Intel64 virtualization product for enterprise as well as home use. Not only is VirtualBox an extremely feature rich, high performance product for enterprise customers. 다음은 윈도우에 버추얼박스를 설치하는 방법입니다. 다운로드 버추얼박스 홈페이지에 접속합니다. 왼쪽 메뉴의 Downloads 또는 Download VirtualBox 버튼을 클릭합니다. 자신의 OS에 맞는 ...
버추얼박스 / 윈도우 10에서 가상 머신 만들 때 멈추는 문제 해결하는 방법
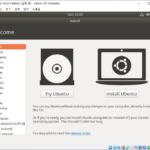
버추얼박스로 가상 머신을 만들 때, 환경에 따라 이런 저런 문제가 발생할 수 있습니다. 이번에 생긴 문제는 아주 근본적인 문제, 가상 머신에 OS를 설치할 수 없는 것이었습니다. 윈도우 호스트에 Ubuntu 게스트를 만들려고 했는데, 아래와 같은 화면에서 멈춰서 아무 것도 할 수 없었습니다. 원인은 윈도우에 포함된 가상화 관련 기능때문이었습니다. 안드로이드 앱 개발을 위해서 ...
OBS Studio / 디스플레이 캡쳐 / 특정 영역 녹화하는 방법
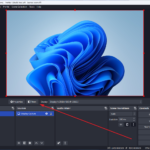
OBS Studio로 녹화할 때, 모니터 전체가 아닌 특정 영역만 녹화할 수 있다. 디스플레이 캡처를 추가하고, 필요한 부분만 남기고 자르면 된다. 를 추가한다. 를 클릭한다. 를 클릭한다. 적당히 이름을 정하고 를 클릭한다. 영역 지정 방법은 상대적과 절대적이 있는데, 에 체크 되어 있으면 상대적으로 지정한다. 아래와 같이 하면 상하좌우 300px을 자르고 남은 부분을 지정한다. 아래와 ...
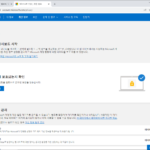
더 이상 사용하지 않는 마이크로소프트 계정을 삭제하기로 했다. 내 계정에 들어가서 개인 정보, 보안 등 계속 회원 탈퇴 메뉴를 찾았는데, 너무 찾기 힘들다. 회원 이탈 방지를 위해서 그렇게 한 건 이해가 되는데, 해도 해도 너무한다. 만약 회원 탈퇴를 하고 싶다면, 메뉴를 탐색하지 말고, 아래 링크로 바로 접속하자. https://account.live.com/closeaccount.aspx 다음과 같은 화면이 나오고, 바로 ...
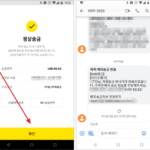
안드로이드 / 앱 / 카카오뱅크 / 해외 송금 / WU(Western Union)으로 송금하는 방법
해외로 송금하는 방법은 여러 가지가 있습니다. 직접 송금도 있고, PayPal 같은 서비스를 이용할 수도 있고... 방법도 다르고 수수료도 다른데... 보내는 사람 입장에서 가장 편한 건 Western Union입니다. 보내는 사람 입장이라고 한 것은, 받는 쪽은 번거롭기 때문입니다. 서류를 작성해서 은행에 가야 하거든요. 하지만, 보내기 쉽고, 빠르게 전달되고 수수료가 적다는 장점이 있습니다. 카카오뱅크에서도 Western ...
우연히 문명이라는 게임을 알게되었습니다. '문명하셨습니다'라는 유행어가 있었을 정도로 유명한 게임이라고 하네요. 게임을 시작하면 시간은 별로 안 가는데 날짜가 바뀐다는... 인터넷에 있는 온갖 글과 영상이 문명을 추천하고 있어서, 한 번 해보기로 했습니다. 문명 5와 문명 6에 대해서 호불호가 갈리는데, 전 그래도 최신판인 문명 6으로 결정했습니다. 어디서 구입을 해야 하나 알아보았더니, 스팀에 있네요. 게다가 ...
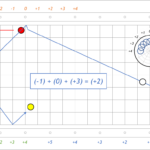
비껴치기로 3쿠션을 칠 때 사용하는 시스템이다. 공이 배치에 따라 회전을 조절하는 것으로, 당점의 변화를 이으면 해가 뜨고 지는 것과 비슷하다 하여 일출일몰 시스템이라 부른다. 파란색이 수구 포인트, 주황색이 1쿠션 포인트, 초록색이 3쿠션 포인트이다. 포인트들을 다 더하여 당점을 정한다. 수구 포인트 + 1쿠션 포인트 + 3쿠션 포인트 = 팁 수 아래의 경우 2팁으로 친다. ...
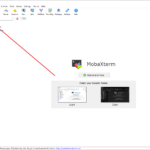
다운로드 MobaXTerm 다운로드 : https://mobaxterm.mobatek.net/download.html Home Edition과 Professional Edition 두 가지가 있고, Home Edition은 기능 제한이 있는 무료이다. Download now를 클릭한다. Portable edition은 설치가 필요 없고, Installer edition은 설치를 해야 한다. 원하는 것을 다운로드한다. SSH 기본 MobaXTerm을 실행하고, 을 클릭한다. SSH를 클릭한다. 접속에 필요한 정보를 입력하고, 를 클릭하면... 새 탭이 생기면서 연결된다. 로그인하면 아래와 같은 화면이 나온다. 로그아웃하면 세션이 끊기고, 엔터키를 누르면 ...
Ubuntu Server / do-release-upgrade / 버전 업그레이드 명령어
Ubuntu 새 버전이 나오면 어떻게 업그레이드를 할까? 새로 설치하고 다시 설정하는 게 제일 좋지만, 설정할 게 많다면 바로 업그레이드를 할 수도 있다. 업그레이드는 do-release-upgrade 명령어로 한다. do-release-upgrade -h Usage: do-release-upgrade Options: -h, --help show this help message and exit -V, ...