리눅스 / 사용자 / 사용자 조회, 사용자 추가, 사용자 삭제, 사용자 수정
사용자 조회
- 모든 사용자를 출력합니다.
# cat /etc/passwd
root:x:0:0:root:/root:/bin/bash
bin:x:1:1:bin:/bin:/sbin/nologin
daemon:x:2:2:daemon:/sbin:/sbin/nologin
adm:x:3:4:adm:/var/adm:/sbin/nologin
lp:x:4:7:lp:/var/spool/lpd:/sbin/nologin
sync:x:5:0:sync:/sbin:/bin/sync
shutdown:x:6:0:shutdown:/sbin:/sbin/shutdown
halt:x:7:0:halt:/sbin:/sbin/halt
mail:x:8:12:mail:/var/spool/mail:/sbin/nologin
operator:x:11:0:operator:/root:/sbin/nologin
games:x:12:100:games:/usr/games:/sbin/nologin
ftp:x:14:50:FTP User:/var/ftp:/sbin/nologin
...
- root과 useradd 또는 adduser를 통해 생성한 사용자 계정을 출력합니다.
# grep /bin/bash /etc/passwd
root:x:0:0:root:/root:/bin/bash
jb:x:1000:1000:JB:/home/jb:/bin/bash
사용자 추가
useradd
- jb 사용자를 만듭니다.
useradd jb
- 사용자 홈 디렉토리도 같이 만들고 싶다면 -d 옵션을 사용합니다.
useradd jb -d /home/jbdir
- jb 사용자의 비밀번호를 만듭니다.
passwd jb
adduser
- adduser 명령어로 사용자를 추가할 수 있습니다. useradd와는 달리 사용자 홈 디렉토리를 자동으로 만들고, 비밀번호 설정 등도 한 번에 할 수 있습니다.
# adduser jb
Adding user `jb' ...
Adding new group `jb' (1000) ...
Adding new user `jb' (1000) with group `jb' ...
Creating home directory `/home/jb' ...
Copying files from `/etc/skel' ...
New password:
Retype new password:
passwd: password updated successfully
Changing the user information for jb
Enter the new value, or press ENTER for the default
        Full Name []:
        Room Number []:
        Work Phone []:
        Home Phone []:
        Other []:
Is the information correct? [Y/n]
사용자 수정
- jb 사용자의 uid를 1001로 변경합니다.
usermod -u 1001 jb
- jb 사용자의 홈 디렉토리를 /home/jb-home으로 변경합니다. 이때 /home/jb-home는 수동으로 생성해야 합니다.
usermod -d /home/jb-home jb
- /home/jb-home을 생성하고, jb 사용자의 홈 디렉토리를 /home/jb-home으로 변경하고, 파일 등을 이동합니다.
usermod -m -d /home/jb-home jb
사용자 삭제
- jb 사용자를 삭제합니다.
userdel jb
- jb 사용자를 강제로 삭제합니다.
userdel -f jb
userdel --force jb
- jb 사용자와 함께 사용자 디렉토리, 사용자 메일함도 삭제합니다.
userdel -r jb
userdel --remove jb
기타
- jb 사용자가 속한 모든 그룹을 출력합니다.
groups jb
파일 이름 바꾸기 mv는 파일을 이동시키는 명령어이다. 이 명령어를 이용해서 파일 이름을 바꿀 수 있다. 예를 들어 다음은 abc.txt를 xyz.txt로 바꾼다. # mv abc.txt xyz.txt 디렉토리 이름 바꾸기 디렉토리 이름을 바꾸는 것도 파일 이름 변경과 같다. 다음은 abc 디렉토리의 이름을 xyz로 바꾼다. # mv abc xyz
Ubuntu 22.04 Server / SSH / 포트 변경하는 방법
보안 상의 이유로 SSH 포트는 변경하는 것이 좋다. Ubuntu 22.04 Server에서 SSH 포트 변경하는 방법은 다음과 같다. 1980으로 변경한다고 가정한다. /etc/ssh/sshd_config에서 다음의 코드를... #Port 22 다음으로 변경한다. Port 1980 방화벽이 활성화되어 있다면 1980 포트를 열어준다. ufw allow 1980/tcp SSH 서비스를 다시 시작한다. systemctl restart ssh SSH 서비스를 다시 시작해도 적용되지 않으면, 컴퓨터를 다시 시작한다.
리눅스 / 명령어 / cat / 파일 내용 출력하는 명령어
리눅스의 cat(concatenate의 약자) 명령어는 파일의 내용을 화면에 출력하거나 파일을 결합하는 데 사용됩니다. cat 명령어는 주로 텍스트 파일을 다룰 때 유용하며, 여러 개의 파일을 한 번에 읽거나 결합할 수 있습니다. 다음과 같은 두 개의 파일이 있다고 할 때 file1 1-1 1-2 1-3 file2 2-1 2-2 2-3 cat filename cat 뒤에 파일 이름을 넣으면 파일 안의 내용을 보여줍니다. # cat file1 1-1 1-2 1-3 파일 이름을 연달아 넣으면 ...
ODD가 없는 컴퓨터에 OS를 설치하는 방법은 두가지입니다. 첫번째는 휴대용 ODD를 이용하는 것이고, 두번째는 USB에 설치 파일을 넣어서 이용하는 것입니다. 두번째 방법이 간편하기는 하지만 설치용 USB를 만드는 게 좀 번거롭습니다. 하지만, 우분투(Ubuntu) 설치용 USB는 몇 번의 클릭으로 쉽게 만들 수 있습니다. 우분투 다운로드 원하는 우분투 버전을 다운로드 받습니다. Universal USB Installer 다운로드 다음의 링크에서 Universal USB Installer를 다운로드 ...
리눅스 / 절전 모드 진입 끄는 방법, 노트북 덮개 닫아도 켜져 있게 하는 방법
노트북에 리눅스를 설치했다. 노트북에 설치했지만 용도는 서버용. 그래서 항상 켜져 있어야 한다. 그런데 노트북의 특성인지 일정 시간이 지나면 절전 모드로 들어가고, 노트북 덮개를 닫으면 잠금(?) 상태가 된다. 그래서 서비스가 중지되거나 원격 연결이 되지 않는데... 항상 켜져 있게 하는 방법은 다음과 같다. 절전 모드 진입하기 않게 하는 방법 다음과 같이 명령하면 절전 모드가 해제된다. # ...
우분투 다운로드 우분투 다운로드는 보통 우분투 홈페이지에서 합니다. 상단의 Downloads 메뉴를 클릭하고 안내를 따라가면 됩니다. 그런데, 우분투 홈페이지를 통해 다운로드를 받으면 전송 속도가 느릴 수 있습니다. 만약 너무 느리다면 가까운 미러 사이트에 직접 접속하여 다운로드해보세요. 빠르게 다운로드를 할 수 있습니다. 카카오 서버 한국이라면 카카오 서버가 빠릅니다. 우분투 페이지로 간 다음 원하는 버전을 선택합니다. 데스크톱 이미지와 ...
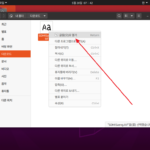
Ubuntu 20.04 Desktop 설치하려는 글꼴을 더블 클릭하거나, 글꼴 선택 후 엔터키를 누르거나, 마우스 우클릭 후 를 클릭합니다. 상단에 있는 를 클릭합니다. 설치가 완료되면 으로 바뀝니다. 글꼴이 잘 설치되었는지 확인합니다.
리눅스 / 명령어 / man / 명령어의 설명서 출력하는 명령어
man은 manual의 약어로, 명령어의 설명서를 출력하는 명령어이다. man 뒤에 명령어 이름을 넣고 엔터를 누릅니다. 예를 들어 # man rm 은 rm 명령어의 설명서를 출력한다. ↑ 키를 누르면 한 줄 위로 올라가고, ↓ 키를 누르면 한 줄 아래로 내려간다. Page Up 키를 누르면 한 페이지 위로 올라가고, Page Down 키를 누르면 한 페이지 아래로 내려간다. /를 ...

CentOS 7 / yum으로 phpMyAdmin 설치하는 방법
phpMyAdmin은 MySQL 또는 MariaDB를 관리하는 유용한 툴입니다. 그런데 CentOS 7 기본 패키지에는 포함되어 있지 않습니다. 하지만, EPEL Repo를 추가하면 yum으로 설치하고 업그레이드를 할 수 있습니다. EPEL Repo 추가 yum install epel-release phpMyAdmin 설치 yum install phpmyadmin 설정 파일 /etc/httpd/conf.d/phpMyAdmin.conf 기본 설정은 외부 접속 불가입니다. 접속하는 PC의 IP를 추가하면 외부 접속이 가능합니다. 접속 주소 http://server-ip/phpMyAdmin
명령어 개요 adduser 사용자 추가하는 명령어. alias 명령어 별칭을 만든다. cal calendar. 달력을 출력하는 명령어. cat concatenate. 파일 내용 출력하는 명령어. cd change directory. 다른 디렉토리로 이동하는 명령어. chmod 파일 또는 디렉토리의 읽기, 쓰기, 실행 권한 설정하는 명령어 chown 파일 또는 디렉토리의 소유자(그룹) 설정하는 명령어 clear 터미널 화면의 내용을 다 지운다. cp copy. 파일 또는 디렉토리 복사. du disk usage. 디스크 사용량 출력. file 파일의 종류를 출력하는 명령어 find 파일 또는 디렉토리를 검색하는 명령어 free 메모리 사용량 ...