리눅스 / 명령어 / touch / 빈 파일 만들기, 최종 수정 시간 변경하기
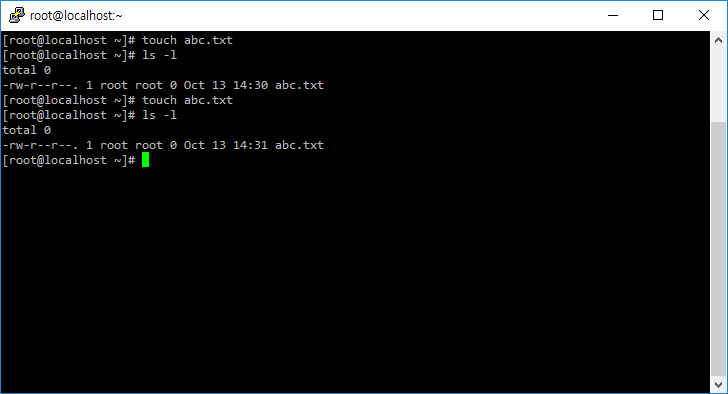
touch는 빈 파일 만들거나 파일의 최종 수정 시간을 현재 시간으로 바꾸는 명령어이다.
- abc.txt 파일이 없다면, 내용이 없는 abc.txt 파일을 만듭니다.
- abc.txt 파일이 있다면, 파일의 최종 수정 시간을 현재로 변경합니다.
# touch abc.txt
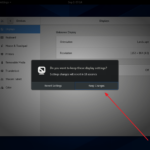
바탕화면에서 마우스 우클릭하고 Display Settings를 클릭합니다. Resolution에서 원하는 해상도를 선택합니다. 오른쪽 위의 Apply를 클릭합니다. Keep Changes를 클릭합니다. 해상도 변경이 완료되었습니다.
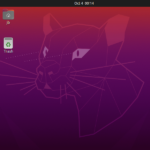
Ubuntu 20.04 Server / GUI 설치하는 방법
Ubuntu Server는 CLI(Command Line Interface) 환경으로 설치된다. 그런데 어떤 작업은 GUI(Graphical Uer Interface) 환경에서 하는 것이 편하다. 만약 GUI 환경이 필요하다면 설치하여 사용할 수 있다. GUI 패키지에는 kubuntu-desktop lubuntu-desktop ubuntu-desktop ubuntu-desktop-minimal xubuntu-desktop 등이 있다. 주로 ubuntu-desktop 또는 ubuntu-desktop-minimal을 사용하는 듯 하다. 예를 들어 ubuntu-desktop-minimal을 설치한다면, 다음과 같이 명령하면 된다. # apt install ubuntu-desktop-minimal Minimal임에도 불구하고 꽤 많은 저장소 공간이 필요하다. After ...
리눅스 / 절전 모드 진입 끄는 방법, 노트북 덮개 닫아도 켜져 있게 하는 방법
노트북에 리눅스를 설치했다. 노트북에 설치했지만 용도는 서버용. 그래서 항상 켜져 있어야 한다. 그런데 노트북의 특성인지 일정 시간이 지나면 절전 모드로 들어가고, 노트북 덮개를 닫으면 잠금(?) 상태가 된다. 그래서 서비스가 중지되거나 원격 연결이 되지 않는데... 항상 켜져 있게 하는 방법은 다음과 같다. 절전 모드 진입하기 않게 하는 방법 다음과 같이 명령하면 절전 모드가 해제된다. # ...
리눅스 / 명령어 / mkdir / 디렉토리 만드는 명령어
mkdir은 make directory의 약자로, 디렉토리를 만드는 명령어이다. abc 디렉토리를 만든다. # mkdir abc abc 디렉토리 아래에 def 디렉토리를 만든다. 만약 abc 디렉토리가 없다면 def 디렉토리를 만들 수 없다는 메시지가 나온다. # mkdir abc/def p 옵션을 붙이면 abc 디렉토리가 없어도 abc 디렉토리를 만든 후에 def 디렉토리를 만든다. # mkdir -p abc/def 리눅스 / 명령어 / rm / 파일 ...
리눅스 / chown, chmod / 파일 또는 디렉토리 소유자, 소유그룹, 권한 설정
chown과 chmod는 파일 및 디렉토리의 권한과 소유자를 관리하는 데 사용되는 Linux 명령어입니다. 정보 확인 ls 명령어에 -l 옵션을 붙여서 파일 또는 디렉토리의 권한과 소유자(그룹)을 확인할 수 있습니다. 제일 앞에 있는 문자는 디렉토리인지 파일인지는 나타냅니다. d는 디렉토리라는 뜻이고, -는 파일이라는 뜻입니다. 그 다음 3개의 문자열은 소유자의 권한을, 그 다음 3개의 문자열은 소유그룹의 권한을, 그 다음 ...
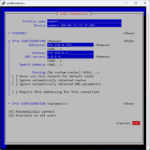
보통 Rocky Linux를 설치할 때 IP를 설정하나, 여러 가지 이유로 IP 설정을 다시 해야 하는 경우가 있다. IP를 설정하는 두 가지 방법을 소개한다. TUI 네트워크 설정 파일을 수정하는 것보다는 NetworkManager Text User Interface(nmtui)를 이용하는 게 편하다. nmtui를 실행한다. Edit a connection을 선택한다. 설정하려는 네트워크 카드를 선택한다. 현재 설정이 나오는데... 적절히 설정한다. 다음과 같이 명령하여 반영한다. systemctl restart NetworkManager GUI Settings를 연다. Network에서 ...

CentOS 7 / Samba / 설치하고 공유 폴더 만드는 방법
Samba 설치 Samba 패키지 이름은 samba입니다. yum install samba 방화벽 설정 Samba가 사용하는 포트를 열어줍니다. firewall-cmd --permanent --zone=public --add-service=samba 방화벽을 다시 로드합니다. firewall-cmd --reload 참고 : CentOS 7 / firewall-cmd 명령어로 방화벽 관리하기 SELinux SELinux를 적절히 설정하거나 끕니다. 참고 : CentOS 7 / SELinux 끄는 방법 Samba 사용자 추가 사용자가 Samba를 사용할 수 있도록 해줍니다. 만약 사용자계정이 user1이라면 다음과 같이 합니다. smbpasswd -a user1 Samba 설정 Samba 설정 ...
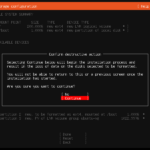
다운로드 Ubuntu Server 다운로드 페이지는 다음과 같다. https://ubuntu.com/download/server 최신 버전에 대한 안내가 주로 있으므로, 구버전을 다운로드하고 싶다면 아래 링크가 편하다. https://mirror.kakao.com/ubuntu-releases/ 가상 머신에 설치한다면 다운로드한 ISO 파일을 그대로 사용하면 되고, 물리 서버에 설치한다면 Rufus 같은 툴을 이용하여 부팅 USB를 만든다. 설치 설치 미디어로 부탕하고 잠시 기다리면 언어를 선택하는 화면이 나온다. 원하는 언어를 선택하고 엔터키를 누른다. 키보드 레이아웃을 정하고 ...
Ubuntu 18.04 Server / Apache / 사용자 인증 만드는 방법
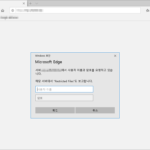
웹사이트의 콘텐츠를 특정 사용자만 볼 수 있게 하는 방법은 여러 가지가 있습니다. 만약 웹서버에 대한 충분한 권한이 있다면, Apache를 이용하여 구현할 수 있습니다. 비밀번호 파일 만들기 비밀번호 파일은 htpasswd 명령어로 만듭니다. /home/auth/ 디렉토리에 passwords라는 이름의 파일을 만들고, 사용자 user1의 비밀번호를 정하고 싶다면 다음과 같이 명령합니다. # htpasswd -c /home/auth/passwords user1 .htaccess 파일 만들기 웹사이트의 루트 ...
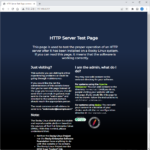
Rocky Linux 9 / Apache, PHP, MariaDB 설치
Rocky Linux 9에 Apache, PHP, MariaDB를 설치하는 방법을 정리합니다.