Ubuntu 18.04 Server / 시간대(time zone) 설정하는 방법
현재 서버의 시간대 확인
현재 서버에 설정된 시간대는 date 명령어로 확인할 수 있다.
# date
시간대 설정 방법 1 - dpkg-reconfigure tzdata
시간대를 설정하고 싶다면 다음과 같이 명령한다.
# dpkg-reconfigure tzdata
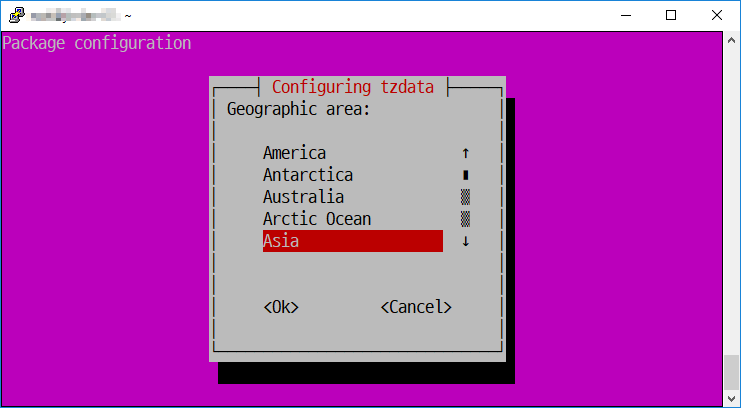
한국이라면 Asia를 선택하고 Seoul을 선택합니다.
시간대 설정 방법 2 - tzselect
tzselect 명령으로 설정할 수 있다. 번호를 입력하여 시간대를 정한다.
# tzselect
Please identify a location so that time zone rules can be set correctly.
Please select a continent, ocean, "coord", or "TZ".
 1) Africa
 2) Americas
 3) Antarctica
 4) Asia
 5) Atlantic Ocean
 6) Australia
 7) Europe
 8) Indian Ocean
 9) Pacific Ocean
10) coord - I want to use geographical coordinates.
11) TZ - I want to specify the time zone using the Posix TZ format.
#?
다음과 같은 질문이 나오면 1을 입력한다.
Is the above information OK?
1) Yes
2) No
#?
하지만, 적용시키기 위해서는 .profile을 수정해야 한다.
You can make this change permanent for yourself by appending the line
        TZ='Africa/Algiers'; export TZ
to the file '.profile' in your home directory; then log out and log in again.
따라서, 방법 1이 더 편하다.
시간대 설정 방법 3 - GUI
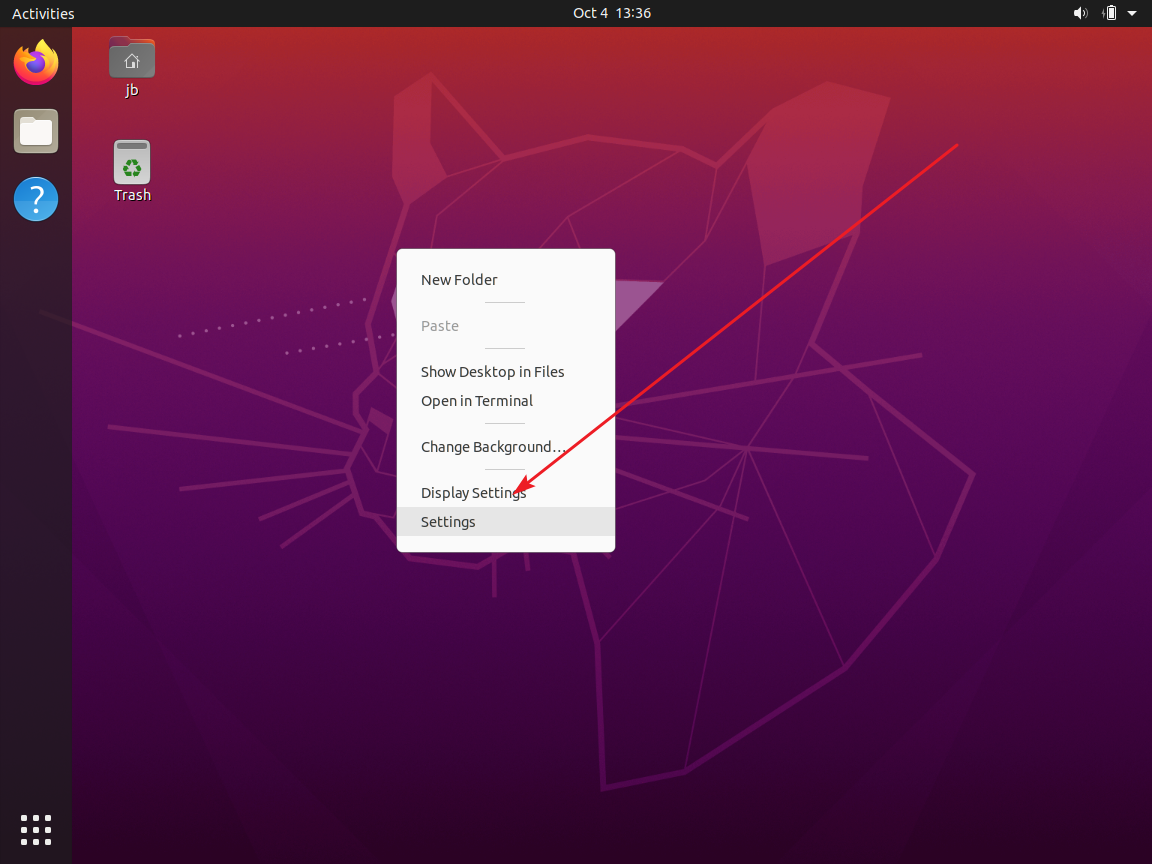
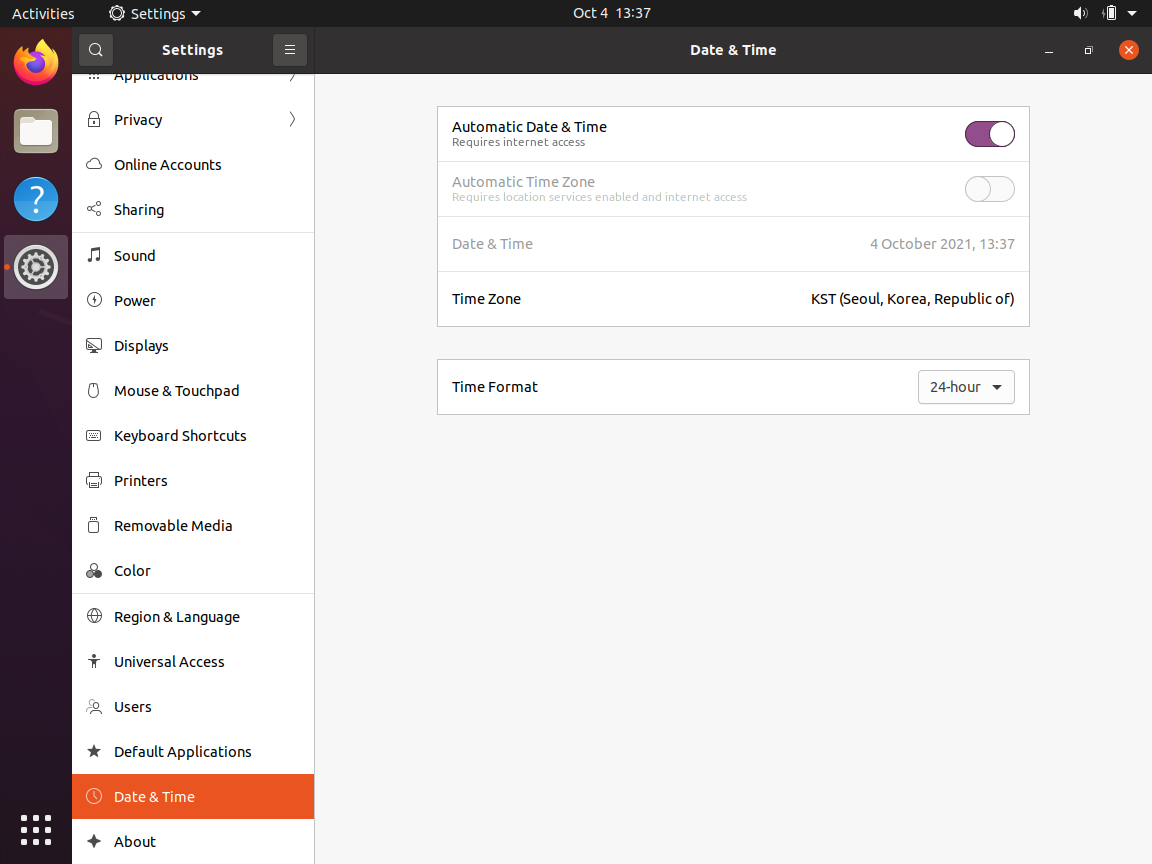
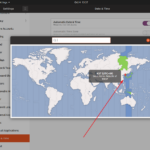
- GUI 환경이라면 설정(Settings)으로 들어간다.
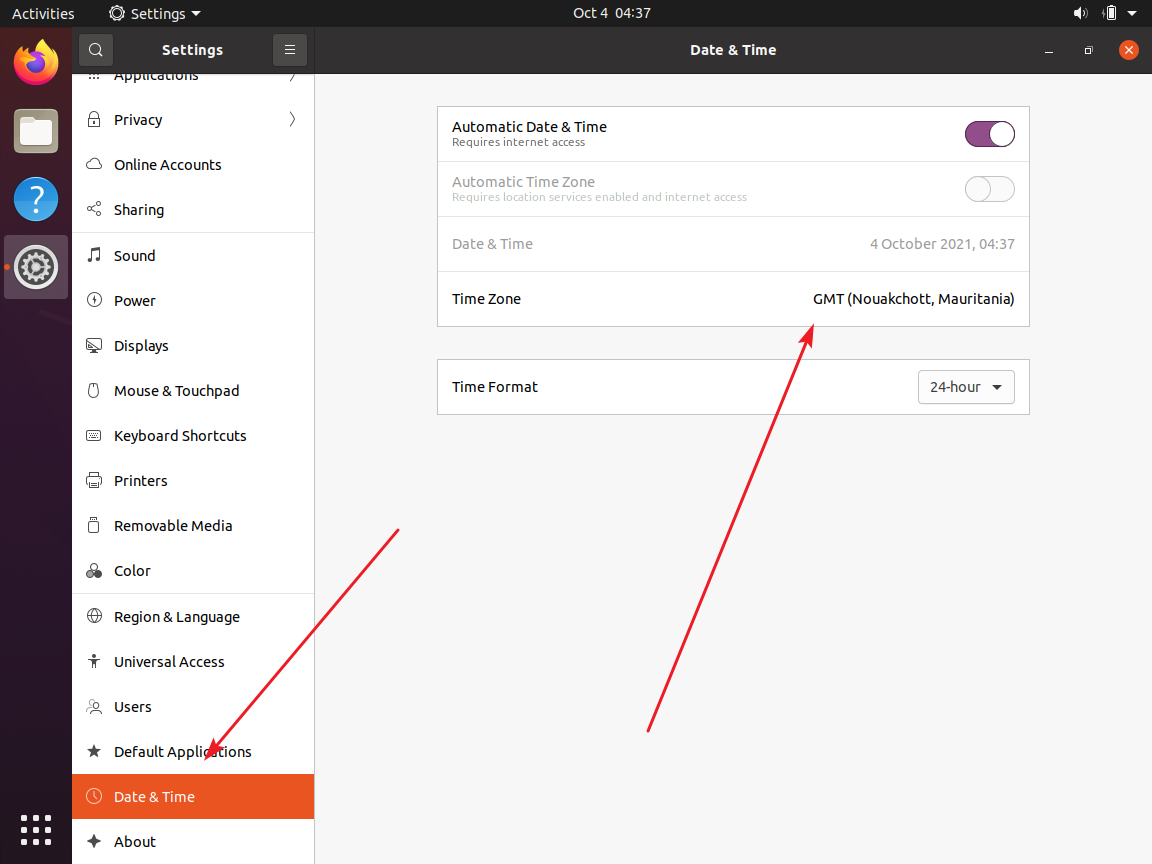
- 왼쪽에서 Date & Time을 선택하고, 오른쪽에서 Time Zone을 클릭한다.
- 원하는 시간대를 선택하면...
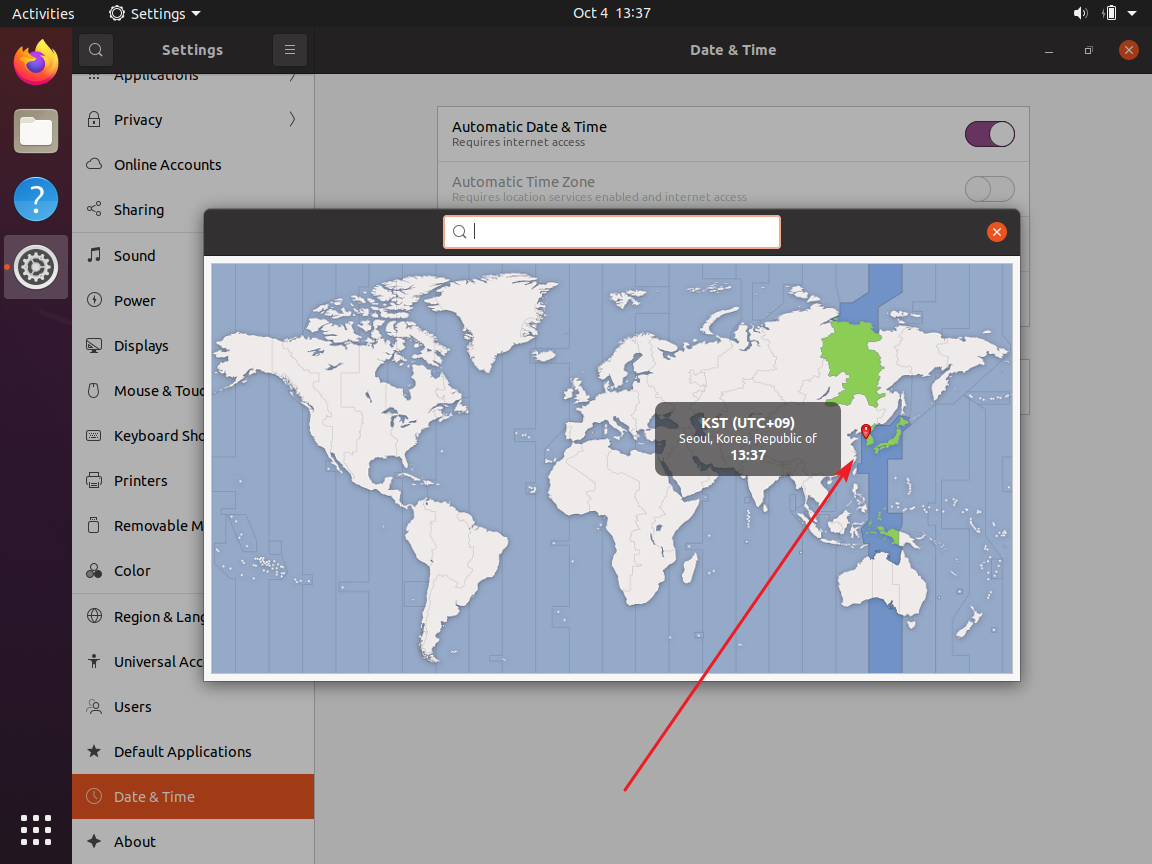
- 바로 적용된다.
Ubuntu 24.04 Server / 고정 IP 설정하는 방법
네트워크 설정 파일은 /etc/netplan 디렉토리 안에 있는 yaml 파일입니다. 파일 이름은 시스템마다 다를 수 있습니다. # ll /etc/netplan total 12 drwxr-xr-x 2 root root 4096 Apr 27 23:00 ./ drwxr-xr-x 108 root root 4096 Apr 27 23:06 ../ -rw------- 1 root root 389 Apr 27 23:00 50-cloud-init.yaml DHCP라면 설정 파일이 다음과 ...
Ubuntu / 특정 패키지만 업그레이드 하기, 보안 업데이트만 업그레이드 하기
우분투 서버에 접속하면 업데이트가 필요한 패키지가 있는지 알려줍니다. 두 가지 분류로 알려주는데, 하나는 패키지 업데이트, 또 하나는 보안 업데이트입니다. 소프트웨어는 보통 최신 버전을 유지하는 것이 좋지만, 업그레이드했을 때 문제가 없는지 충분히 확인을 해야 합니다. 따라서 특정 패키지만 업그레이드를 하거나, 보안 업데이트만 해야 하는 경우가 발생하는데, 어떻게 그런 작업을 하는지 알아보겠습니다. 특정 ...
Ubuntu 18.04 Server / Nginx, PHP, MariaDB 설치하고 설정하기
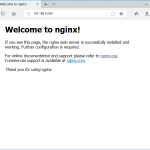
Nginx 설치 Nginx를 설치합니다. # apt install nginx 만약 방화벽을 사용하고 있다면 포트를 열어줍니다. # ufw allow 'Nginx Full' 서버 주소로 접속했을 때 다음과 같이 나오면 제대로 된 것입니다. 시작, 정지 등 Nginx를 시작합니다. # systemctl start nginx Nginx를 멈춥니다. # systemctl stop nginx Nginx를 재시작합니다. # systemctl restart nginx Nginx를 다시 로드합니다. # systemctl reload nginx Nginx를 설치하면 부팅 시 자동으로 시작하게 설정됩니다. 만약 자동 ...
Ubuntu 20.04 Desktop 설치하려는 글꼴을 더블 클릭하거나, 글꼴 선택 후 엔터키를 누르거나, 마우스 우클릭 후 를 클릭합니다. 상단에 있는 를 클릭합니다. 설치가 완료되면 으로 바뀝니다. 글꼴이 잘 설치되었는지 확인합니다.
Ubuntu 22.04 Server / SSH / 포트 변경하는 방법
보안 상의 이유로 SSH 포트는 변경하는 것이 좋다. Ubuntu 22.04 Server에서 SSH 포트 변경하는 방법은 다음과 같다. 1980으로 변경한다고 가정한다. /etc/ssh/sshd_config에서 다음의 코드를... #Port 22 다음으로 변경한다. Port 1980 방화벽이 활성화되어 있다면 1980 포트를 열어준다. ufw allow 1980/tcp SSH 서비스를 다시 시작한다. systemctl restart ssh SSH 서비스를 다시 시작해도 적용되지 않으면, 컴퓨터를 다시 시작한다.
Ubuntu Server 22.04 / vsftpd로 FTP 서버 구축하기
vsftpd vsftpd(Very Secure FTP Daemon)는 유닉스와 리눅스에서 사용할 수 있는 가벼운 FTP 서버입니다. 주요 특징은 다음과 같습니다. Virtual IP configurations Virtual users Standalone or inetd operation Powerful per-user configurability Bandwidth throttling Per-source-IP configurability Per-source-IP limits IPv6 Encryption support through SSL integration 설치 vsftpd는 우분투 패키지에 포함되어 있으므로 다음과 같이 명령하여 설치할 수 있습니다. # apt install vsftpd 방화벽을 사용 중이라면 다음과 같이 명령하여 포트를 ...
Ubuntu 22.04 Server / ufw로 방화벽 설정하는 방법
우분투에서 방화벽을 설정하는 명령어는 ufw이다. ufw로 방화벽을 활성화시키고 관리하는 방법은 다음과 같다. 방화벽 활성화 ufw enable 방화벽 비활성화 ufw disable 방화벽 상태 확인 ufw status 53 포트 허용 ufw allow 53 53 포트 tcp 패킷 허용 ufw allow 53/tcp 53 포트 udp 패킷 허용 ufw allow 53/udp 53 포트 거부 ufw deny 53 53 포트 tcp 패킷 거부 ufw deny 53/tcp 53 포트 udp 패킷 거부 ufw deny ...
SSH 설정 설정 파일 /etc/ssh/sshd_config 포트 변경하기 다음 코드를 #Port 22 다음처럼 바꾼다. Port 1234 포트 번호는 자신이 원하는 것으로... root 계정 로그인 가능하게 만들기 다음 코드를 #PermitRootLogin prohibit-password 다음처럼 만든다. PermitRootLogin yes 설정 변경 적용하기 service ssh restart
Ubuntu 18.04 Server / 시간대(time zone) 설정하는 방법
현재 서버의 시간대 확인 현재 서버에 설정된 시간대는 date 명령어로 확인할 수 있다. # date 시간대 설정 방법 1 - dpkg-reconfigure tzdata 시간대를 설정하고 싶다면 다음과 같이 명령한다. # dpkg-reconfigure tzdata 한국이라면 Asia를 선택하고 Seoul을 선택합니다. 시간대 설정 방법 2 - tzselect tzselect 명령으로 설정할 수 있다. 번호를 입력하여 시간대를 정한다. # tzselect Please identify a location so that time ...
ODD가 없는 컴퓨터에 OS를 설치하는 방법은 두가지입니다. 첫번째는 휴대용 ODD를 이용하는 것이고, 두번째는 USB에 설치 파일을 넣어서 이용하는 것입니다. 두번째 방법이 간편하기는 하지만 설치용 USB를 만드는 게 좀 번거롭습니다. 하지만, 우분투(Ubuntu) 설치용 USB는 몇 번의 클릭으로 쉽게 만들 수 있습니다. 우분투 다운로드 원하는 우분투 버전을 다운로드 받습니다. Universal USB Installer 다운로드 다음의 링크에서 Universal USB Installer를 다운로드 ...