Monitor / Buying a Monitor Arm: VESA, Weight, and Desk Checks
A monitor arm must match the VESA mounting interface, monitor weight without its stand, screen shape, and desk-fixing conditions—not just screen size. Even below the maximum weight, a monitor may fail to hold position if it is below the arm’s minimum load or its center of gravity is unsuitable. Check the monitor, arm, and desk instructions together before buying.
Check the VESA interface and physical mounting area
A VESA mounting interface specifies mounting arrangements such as the hole pattern on the back of a display. Measurements such as 75 × 75 mm or 100 × 100 mm are examples of horizontal and vertical hole spacing, not universal values for all monitors. Consult VESA’s FDMI interface overview and the exact product manual.
Matching hole spacing is not enough if the mounting area is recessed or surrounded by protrusions that interfere with the plate. Check whether a dedicated adapter is required and whether the plate blocks ventilation or ports. If the monitor lacks a supported VESA mount, look for a manufacturer-approved alternative rather than improvising an adhesive attachment.
Follow the monitor and arm manuals for screw diameter, pitch, length, and spacers. Screws that are too long may damage internal parts; short screws may not engage sufficiently. Do not reuse screws from another monitor merely because the holes match, or force a screw that will not seat correctly.
Weight and center of gravity matter more than diagonal size
Compare the specified load range with the monitor’s weight without its stand and the accessories carried with it. Check whether mounting adapters and attached computer holders must be included in the arm’s load calculation. Some spring-balanced arms have a minimum load as well as a maximum; a monitor that is too light may rise on its own.
Ultrawide and curved displays can place different demands on the tilt joint because of their width, depth, and center of gravity. At the same weight, a center of gravity farther forward changes the holding requirements. Check exact-model compatibility and any curved-display conditions rather than relying only on inches or kilograms. Ergotron’s arm-selection guidance also considers weight and mounting conditions.
Portrait rotation requires clearance above the desk, sufficient cable length, and a display approved for that orientation. Compare the arm’s height, reach, and folded depth with your actual desk and wall spacing.
Make sure the desk supports the fixing method
| Item | What to verify |
|---|---|
| Clamp | Desktop thickness, rear lip/frame, and space underneath for tightening |
| Grommet mount | Hole size/location and permitted installation conditions |
| Desktop construction | Material, internal structure, support, and manufacturer restrictions |
| Surrounding space | Wall/shelf clearance and folded-arm depth |
| Movement area | Collisions with people or other equipment |
Glass, hollow-core, and damaged desktops must not be treated like a solid, suitable surface. Adding a reinforcement plate does not automatically make the installation safe. Confirm approval from the desk and arm manufacturers; otherwise use a stand or another approved mounting arrangement.
Fit the clamp to a flat, supported area as instructed. Do not clamp onto a decorative edge or thin lip, or tighten until the desktop deforms. If the desk or mount moves, stop before extending the arm farther and investigate the fixing.
Follow the assembly sequence and keep the screen supported
- Turn off and disconnect the monitor and connected equipment. Read the monitor instructions for supporting the screen and removing the stand.
- Prepare the correct tools, screws, and parts. Install the desk fixing in the arm manufacturer’s specified sequence and tightening conditions.
- Fit the mounting plate while supporting the monitor without pressing on the panel. Confirm screw specifications and engagement depth.
- Use two people where required to support the display during attachment. Do not release it until the latch and locking screws are correctly secured.
- Support the screen while adjusting tension and tilt according to the manual. Identify the correct adjustment point and direction; do not force an adjustment past its limit.
- Connect and route cables, then move slowly through the full intended range to check for pulling, pinching, and interference.
Do not dismantle or modify spring components or gas cylinders. If the display droops, check load range, locking, adjustment points, and desk fixing rather than simply tightening every screw.
Adjust position and leave enough cable slack
Find a readable distance and height that avoids excessive neck extension or flexion in your usual posture. Chair height, desk height, eyesight, and primary task differ, so one fixed measurement does not suit everyone. Consider glasses and multi-monitor placement as well.
Leave slack around joints and monitor ports, and inspect the cables through the whole movement range. A short cable must not pull on the screen or load its connectors. A single-cable laptop setup also needs the appropriate USB-C video, charging, and data support.
Recheck for loosening or desktop deformation at the intervals specified by the manufacturer. If the display keeps dropping or the desk is damaged, stop using the arm, support the monitor safely, and contact the manufacturer.
Monitor / USB-C Video, Charging, and USB Data: What to Check
Check the separate requirements for USB-C monitor video, USB data, and laptop charging. Learn how to select ports and cables, assess bandwidth, and troubleshoot each function.
Monitor / Glossy vs. Matte Screens: Differences and How to Choose
Compare glossy and matte monitor reflections, surface texture, and readability. Choose using your room lighting and content, and check the conditions for films and cleaning.
What Is Integrated Graphics? Differences from a Graphics Card and How to Choose
Compare integrated graphics with a separate graphics card, including shared RAM and upgrade options. Check CPU graphics support, workload requirements, and common causes of missing display output.
Monitor / What Is Mini LED? Local Dimming and Blooming Explained
Learn how Mini LED backlights and local dimming work in LCD monitors. Compare blooming, shadow detail, brightness changes, and operating modes using practical checks.

Home Printer Buying Guide / Printing Technologies, Running Costs, and Essential Features
Choose a home printer by matching its printing technology, maintenance needs, and total running costs to your usage. Compare inkjet, ink tank, and laser options, along with two-sided printing, scanning, wireless connections, and installation requirements.

What Are CPU Threads? Cores, Logical Processors, and Software Threads
Learn the difference between hardware threads, software threads, logical processors, and physical cores. Understand SMT resource sharing and check the counts reported by Windows.
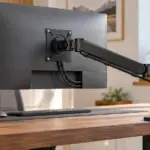
Monitor / Buying a Monitor Arm: VESA, Weight, and Desk Checks
Check VESA fit, screw requirements, minimum and maximum load, center of gravity, and desktop construction. Follow practical steps for installation, tension adjustment, and cable clearance.

What Are CPU Cores? Core Counts and Performance Explained
Understand physical CPU cores, logical processors, hybrid core layouts, and the limits of core-count comparisons. Learn how to check your PC and judge processors for your workload.
Monitor / Color Depth Explained: 8-Bit, 10-Bit, and FRC
Compare the RGB levels in 8-bit and 10-bit signals and understand FRC. Learn how input, panel, and LUT precision differ and how to check a 10-bit output path.
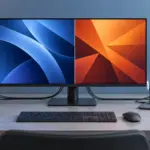
Monitor / KVM, PBP, and PIP: Differences and Two-Computer Setup
Distinguish KVM input and USB switching from PBP and PIP picture modes. Set up two computers with the correct video, upstream mapping, and peripheral checks.