리눅스 / 명령어 / grep
grep은 리눅스 운영체제에서 문자열 검색에 사용되는 명령어입니다. grep은 Global Regular Expression Print의 약자로, 텍스트 파일에서 특정 문자열이나 정규 표현식(패턴)을 검색하고, 해당 줄을 출력합니다.
기본
기본 구조는 다음과 같습니다.
grep [옵션] '검색할 패턴' 파일명
예제 1
예를 들어 다음과 같은 a.txt와 b.txt가 있다고 할 때...
a.txt
abc bcd cde
bcd cde def
efg fgh ghi
b.txt
abc bcd cde
bcd cde def
efg fgh ghi
- a.txt에서 bcd를 포함한 줄을 출력합니다.
# grep bcd a.txt
abc bcd cde
bcd cde def
- 검색어에 공백이 있는 경우 큰 따옴표 또는 작은 따옴표로 감쌉니다.
# grep "abc bcd" a.txt
abc bcd cde
- 기본적으로 대소문자를 구분합니다. -i 옵션을 사용하면 대소문자를 구분하지 않습니다.
# grep -i BCD a.txt
abc bcd cde
bcd cde def
- -v 옵션을 사용하면 검색어를 포함하지 않는 줄을 출력합니다.
# grep -v bcd a.txt
efg fgh ghi
- -n 옵션을 사용하면 줄번호를 표시합니다.
# grep -n bcd a.txt
1:abc bcd cde
2:bcd cde def
- -c 옵션을 사용하면 검색어를 포함한 줄의 개수를 출력합니다.
# grep -c bcd a.txt
2
- 파일명을 여러 개 넣으면, 해당 파일들을 대상으로 결과를 출력합니다. 결과 앞에는 파일명이 표시됩니다.
# grep bcd a.txt b.txt
a.txt:abc bcd cde
a.txt:bcd cde def
b.txt:abc bcd cde
b.txt:bcd cde def
- 와일드카드를 이용할 수도 있습니다. 다음과 같이 하면 확장자가 txt인 모든 파일을 대상으로 검색합니다.
p# grep bcd *.txt
a.txt:abc bcd cde
a.txt:bcd cde def
b.txt:abc bcd cde
b.txt:bcd cde def
- -l 옵션을 사용하면 파일명만 출력합니다.
# grep -l bcd *.txt
a.txt
b.txt
- -r 옵션을 사용하고, 파일명 위치에 디렉토리 이름을 넣으면, 해당 디렉토리와 그 하위 디렉토리에 있는 모는 파일에 대하여 검색합니다.
# grep -r bcd ./
./a.txt:abc bcd cde
./a.txt:bcd cde def
./b.txt:abc bcd cde
./b.txt:bcd cde def
예제 2
명령어로 출력되는 결과에서 검색어를 포함하는 줄을 추려낼 수 있습니다.
- dmesg(시스템 부팅 메시지 확인 명령어)로 출력되는 결과에서 usb를 포함하는 줄을 찾습니다.
# dmesg | grep -i usb
[    0.091630] ACPI: bus type USB registered
[    0.091648] usbcore: registered new interface driver usbfs
[    0.091657] usbcore: registered new interface driver hub
[    0.091669] usbcore: registered new device driver usb
- apache2 서비스 상태를 출력합니다.
# systemctl list-unit-files | grep apache2
apache2.service                            enabled         enabled
apache2@.service                           disabled        enabled
도움말
도움말은 다음과 같습니다.
# grep --help
Usage: grep [OPTION]... PATTERNS [FILE]...
Search for PATTERNS in each FILE.
Example: grep -i 'hello world' menu.h main.c
PATTERNS can contain multiple patterns separated by newlines.

Pattern selection and interpretation:
  -E, --extended-regexp     PATTERNS are extended regular expressions
  -F, --fixed-strings       PATTERNS are strings
  -G, --basic-regexp        PATTERNS are basic regular expressions
  -P, --perl-regexp         PATTERNS are Perl regular expressions
  -e, --regexp=PATTERNS     use PATTERNS for matching
  -f, --file=FILE           take PATTERNS from FILE
  -i, --ignore-case         ignore case distinctions in patterns and data
      --no-ignore-case      do not ignore case distinctions (default)
  -w, --word-regexp         match only whole words
  -x, --line-regexp         match only whole lines
  -z, --null-data           a data line ends in 0 byte, not newline

Miscellaneous:
  -s, --no-messages         suppress error messages
  -v, --invert-match        select non-matching lines
  -V, --version             display version information and exit
      --help                display this help text and exit

Output control:
  -m, --max-count=NUM       stop after NUM selected lines
  -b, --byte-offset         print the byte offset with output lines
  -n, --line-number         print line number with output lines
      --line-buffered       flush output on every line
  -H, --with-filename       print file name with output lines
  -h, --no-filename         suppress the file name prefix on output
      --label=LABEL         use LABEL as the standard input file name prefix
  -o, --only-matching       show only nonempty parts of lines that match
  -q, --quiet, --silent     suppress all normal output
      --binary-files=TYPE   assume that binary files are TYPE;
                            TYPE is 'binary', 'text', or 'without-match'
  -a, --text                equivalent to --binary-files=text
  -I                        equivalent to --binary-files=without-match
  -d, --directories=ACTION  how to handle directories;
                            ACTION is 'read', 'recurse', or 'skip'
  -D, --devices=ACTION      how to handle devices, FIFOs and sockets;
                            ACTION is 'read' or 'skip'
  -r, --recursive           like --directories=recurse
  -R, --dereference-recursive  likewise, but follow all symlinks
      --include=GLOB        search only files that match GLOB (a file pattern)
      --exclude=GLOB        skip files that match GLOB
      --exclude-from=FILE   skip files that match any file pattern from FILE
      --exclude-dir=GLOB    skip directories that match GLOB
  -L, --files-without-match  print only names of FILEs with no selected lines
  -l, --files-with-matches  print only names of FILEs with selected lines
  -c, --count               print only a count of selected lines per FILE
  -T, --initial-tab         make tabs line up (if needed)
  -Z, --null                print 0 byte after FILE name

Context control:
  -B, --before-context=NUM  print NUM lines of leading context
  -A, --after-context=NUM   print NUM lines of trailing context
  -C, --context=NUM         print NUM lines of output context
  -NUM                      same as --context=NUM
      --group-separator=SEP  print SEP on line between matches with context
      --no-group-separator  do not print separator for matches with context
      --color[=WHEN],
      --colour[=WHEN]       use markers to highlight the matching strings;
                            WHEN is 'always', 'never', or 'auto'
  -U, --binary              do not strip CR characters at EOL (MSDOS/Windows)

When FILE is '-', read standard input.  With no FILE, read '.' if
recursive, '-' otherwise.  With fewer than two FILEs, assume -h.
Exit status is 0 if any line is selected, 1 otherwise;
if any error occurs and -q is not given, the exit status is 2.

Report bugs to: bug-grep@gnu.org
GNU grep home page: <https://www.gnu.org/software/grep/>
General help using GNU software: <https://www.gnu.org/gethelp/>

CentOS 7 / Apache, PHP, MariaDB 설치하는 방법
CentOS에 Apache, PHP, MariaDB를 설치하는 방법을 간략히 정리합니다. APM 설치 Apache, PHP, MariaDB을 설치합니다. yum install httpd php mariadb-server php-mysql 서비스 설정 Apache가 부팅 시 자동으로 시작되도록 합니다. systemctl enable httpd.service MariaDB가 부팅 시 자동으로 시작되도록 합니다. systemctl enable mariadb.service Apache를 시작합니다. systemctl start httpd.service MariaDB를 시작합니다. systemctl start mariadb.service 방화벽 설정 http로 접속할 수 있도록 포트를 열어줍니다. firewall-cmd --permanent --add-service=http https로 접속할 수 있도록 포트를 ...
리눅스 커널은 리눅스 운영체제의 핵심 구성 요소로, 시스템 하드웨어와 소프트웨어 간의 중재자 역할을 합니다. 커널은 시스템 자원을 관리하고, 프로세스 간의 통신을 지원하며, 기본적인 보안과 안정성을 제공합니다. 리눅스 커널은 자유 소프트웨어 및 오픈 소스 소프트웨어 개발 및 배포 모델에 따라 개발됩니다. 리눅스 커널의 주요 기능 프로세스 관리 프로세스 생성 및 종료 : 커널은 새로운 ...
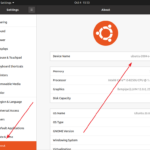
Ubuntu 18.04 Server / 언어 변경하는 방법
현재 언어 확인하기 locale 명령어로 현재 언어가 무엇인지 확인할 수 있습니다. # locale LANG=en_US.UTF-8 LANGUAGE= LC_CTYPE="en_US.UTF-8" LC_NUMERIC="en_US.UTF-8" LC_TIME="en_US.UTF-8" LC_COLLATE="en_US.UTF-8" LC_MONETARY="en_US.UTF-8" LC_MESSAGES="en_US.UTF-8" LC_PAPER="en_US.UTF-8" LC_NAME="en_US.UTF-8" LC_ADDRESS="en_US.UTF-8" LC_TELEPHONE="en_US.UTF-8" LC_MEASUREMENT="en_US.UTF-8" LC_IDENTIFICATION="en_US.UTF-8" LC_ALL= 언어 변경하기 사용할 언어를 먼저 설치합니다. 한국어를 사용하고 싶다면 다음과 같이 명령합니다. # apt-get install language-pack-ko /etc/default/locale을 열고 다음과 같이 만듭니다. LANG=ko_KR.UTF-8 테스트하기 새로 로그인하거나 재부팅하면 변경한 언어가 적용됩니다. 의미 없는 문자열을 입력해보거나... # 123 123: 명령을 찾을 수 없습니다 locale 명령어로 확인할 수 있습니다. # locale LANG=ko_KR.UTF-8 LANGUAGE= LC_CTYPE="ko_KR.UTF-8" LC_NUMERIC="ko_KR.UTF-8" LC_TIME="ko_KR.UTF-8" LC_COLLATE="ko_KR.UTF-8" LC_MONETARY="ko_KR.UTF-8" LC_MESSAGES="ko_KR.UTF-8" LC_PAPER="ko_KR.UTF-8" LC_NAME="ko_KR.UTF-8" LC_ADDRESS="ko_KR.UTF-8" LC_TELEPHONE="ko_KR.UTF-8" LC_MEASUREMENT="ko_KR.UTF-8" LC_IDENTIFICATION="ko_KR.UTF-8" LC_ALL=
리눅스 / 명령어 / rdate / 타임서버의 시간과 동기화해주는 명령어
rdate는 서버의 시간과 타임서버의 시간을 동기화해주는 명령어이다. rdate는 설치되어있지 않는 경우가 많으므로, 필요하다면 설치를 해야 한다. CentOS라면 # yum install rdate Ubuntu라면 # apt install rdate 와 같이 명령하여 설치할 수 있습니다. 타임서버의 시간을 확인할 때는 -p 옵션을 사용합니다. 현재 서버의 시간을 변경하지 않는다. # rdate -p time.bora.net 현재 서버의 시간을 타임서버의 시간으로 맞출 때에는 -s 옵션을 ...
Ubuntu 20.04 Server / hostname 확인하는 방법, 변경하는 방법
hostname 확인하는 방법 방법 1 - 명령어로 확인하기 다음과 같이 명령하면 hostname을 출력한다. hostname 방법 2 - 설정 파일 열어서 확인하기 /etc/hostname 파일에 hostname이 있다. cat /etc/hostname hostname 변경하는 방법 방법 1 - 명령어로 변경하기 다음과 같이 명령하면 hostname이 abc로 바뀐다. hostnamectl set-hostname abc 방법 2 - 설정 파일 열어서 변경하기 텍스트 에디터로 /etc/hostname 파일을 열어서 내용을 abc로 바꾸면 hostname이 abc로 바뀐다. 재부팅 재부팅을 하면 변경사항이 ...
Ubuntu 16.04 Server / 고정 IP 설정하는 방법
네트워크 설정 파일은 /etc/network/interfaces이다. 우분투를 DHCP로 설치했다면 설정 파일의 내용은 다음과 비슷하게 되어 있다. # The primary network interface auto enp0s3 iface enp0s3 inet dhcp 이를 다음처럼 변경하고 저장한다. xxx.xxx.xxx.xxx는 네트워크 환경에 맞게 수정한다. # The primary network interface auto enp0s3 iface enp0s3 inet static address xxx.xxx.xxx.xxx netmask xxx.xxx.xxx.xxx gateway xxx.xxx.xxx.xxx dns-nameservers xxx.xxx.xxx.xxx 다음과 같이 명령하여 네트워크를 재시작한다. systemctl restart networking.service 만약 위와 같이 해도 ...
리눅스에서 IP 주소를 확인하는 방법은 여러 가지가 있으며, 이를 수행하는 데 사용되는 명령어와 도구는 다음과 같습니다. 이 명령어들은 모두 터미널에서 실행됩니다. ip addr 아래 명령어를 실행하면 모든 네트워크 인터페이스의 상세 정보가 표시됩니다. IP 주소는 inet 항목에서 확인할 수 있습니다. # ip addr 1: lo: <LOOPBACK,UP,LOWER_UP> mtu 65536 qdisc noqueue state UNKNOWN group default qlen ...
Webmin은 웹브라우저를 통해 시스템 관리를 하는 툴이다. CentOS라면 아래의 순서로 설치할 수 있다. 저장소 추가 webmin 저장소를 추가한다. vi 등 텍스트 에디터로 저장소 파일을 만들고... # vi /etc/yum.repos.d/webmin.repo 아래의 내용을 추가하고 저장한다. name=Webmin Distribution Neutral #baseurl=http://download.webmin.com/download/yum mirrorlist=http://download.webmin.com/download/yum/mirrorlist enabled=1 키 추가 PGP key를 다운로드하고... # wget http://www.webmin.com/jcameron-key.asc 설치한다. # rpm --import jcameron-key.asc 설치와 설정 webmin을 설치한다. # yum install webmin 10000 포트를 열어준다. # firewall-cmd --add-port=10000/tcp 접속 https://<server-ip>:10000으로 접속한다. 공인 인증서가 없으므로, 웹브라우저에 ...
Ubuntu 22.04 Server / root 계정으로 로그인하는 방법, root 계정으로 ssh 접속하는 방법
Ubuntu는 설치할 때 일반 사용자 계정만 만듭니다. 관리자 권한이 필요할 때는 sudo를 이용하죠. 그런데 공부를 위해 혼자만 사용하거나, 여러 가지 이유로 보안에 문제가 없는 경우 root 계정으로 로그인해서 작업하는 게 편합니다. root 계정으로 로그인 하는 방법 일반 사용자 계정으로 로그인합니다. 다음과 같이 명령하여 root 계정의 비밀번호를 만들면 root 계정으로 로그인할 수 있습니다. # sudo ...
CentOS 7 / rsyslog / 로그 서버 구축하는 방법
CentOS을 설치하면 로그 기록을 위한 rsyslog 패키지가 설치되고 실행됩니다. 로그는 로컬 컴퓨터에 저장되는데, 관리하는 컴퓨터가 여러 대인 경우 각각의 로그를 따로 모니터링하는 것이 불편할 수 있습니다. 그런 경우 하나의 컴퓨터를 로그를 수집하는 서버로 만들어서 그 서버에 로그가 쌓이게 하면, 좀 더 수월하게 로그를 관리할 수 있습니다. rsyslog는 간단한 설정 변경으로 로그 ...