리눅스 / 명령어 / systemctl
systemctl은 서비스를 관리하는 명령어이다.
서비스 상태 확인
systemctl status service_name.service
서비스 시작
systemctl start service_name.service
서비스 재시작
systemctl restart service_name.service
서비스 중지
systemctl stop service_name.service
부팅 시 서비스 자동 시작
systemctl enable service_name.service
부팅 시 서비스 자동 시작 해제
systemctl disable service_name.service
서비스 목록 보기
systemctl list-units --type=service
Ubuntu 18.04 Server / Nginx, PHP, MariaDB 설치하고 설정하기
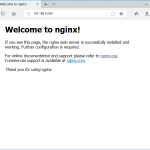
Nginx 설치 Nginx를 설치합니다. # apt install nginx 만약 방화벽을 사용하고 있다면 포트를 열어줍니다. # ufw allow 'Nginx Full' 서버 주소로 접속했을 때 다음과 같이 나오면 제대로 된 것입니다. 시작, 정지 등 Nginx를 시작합니다. # systemctl start nginx Nginx를 멈춥니다. # systemctl stop nginx Nginx를 재시작합니다. # systemctl restart nginx Nginx를 다시 로드합니다. # systemctl reload nginx Nginx를 설치하면 부팅 시 자동으로 시작하게 설정됩니다. 만약 자동 ...
리눅스 / CPU 이름, 코어 수, 스레드 수 확인하는 방법
리눅스에서 lscpu 명령으로 CPU의 정보를 확인할 수 있습니다. 출력하는 내용 중에 CPU 이름, 코어 수, 스레드 수가 있습니다. 아래는 lscpu 명령을 내린 결과 예시입니다. # lscpu Architecture: x86_64 CPU op-mode(s): 32-bit, 64-bit Byte Order: ...
Ubuntu 22.04 Server / 원격 데스크톱으로 연결하는 방법
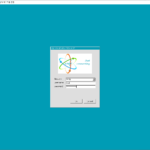
GUI 설치 우분투에 GUI를 설치한다. # apt install ubuntu-desktop-minimal xrdp 설치 xrdp를 설치한다. # apt install xrdp 방화벽 설정 원격 데스크톱은 3389 포트를 사용하므로, 방화벽을 사용하고 있다면 포트를 열어 준다. ufw allow 3389/tcp 원격 데스크톱 연결 원격 데스크톱으로 접속한다. 아래와 같은 창이 뜨는데, 를 클릭한다. 계정 정보를 입력하고 를 클릭하면... 원격지에서 GUI로 우분투를 즐길 수 있다.

Rocky Linux 9 / SSH / 포트 변경하는 방법
SSH는 22 포트를 사용한다. 알려진 포트이므로 다른 포트로 변경하는 것이 보안상 좋다. Rocky Linux 9에서 SSH 포트 변경하는 방법은 다음과 같다. 포트를 1980으로 바꾼다고 가정한다. /etc/ssh/sshd_config에서 다음의 코드를... #Port 22 다음으로 변경한다. Port 1980 SELINUX가 활성화되어 있다면 다음과 같이 명령하여 1980 포트를 사용할 수 있게 만든다. semanage port -a -t ssh_port_t -p tcp 1980 만약 다음과 같은 ...
리눅스 / 명령어 / cat / 파일 내용 출력하는 명령어
리눅스의 cat(concatenate의 약자) 명령어는 파일의 내용을 화면에 출력하거나 파일을 결합하는 데 사용됩니다. cat 명령어는 주로 텍스트 파일을 다룰 때 유용하며, 여러 개의 파일을 한 번에 읽거나 결합할 수 있습니다. 다음과 같은 두 개의 파일이 있다고 할 때 file1 1-1 1-2 1-3 file2 2-1 2-2 2-3 cat filename cat 뒤에 파일 이름을 넣으면 파일 안의 내용을 보여줍니다. # cat file1 1-1 1-2 1-3 파일 이름을 연달아 넣으면 ...
Ubuntu / 특정 패키지만 업그레이드 하기, 보안 업데이트만 업그레이드 하기
우분투 서버에 접속하면 업데이트가 필요한 패키지가 있는지 알려줍니다. 두 가지 분류로 알려주는데, 하나는 패키지 업데이트, 또 하나는 보안 업데이트입니다. 소프트웨어는 보통 최신 버전을 유지하는 것이 좋지만, 업그레이드했을 때 문제가 없는지 충분히 확인을 해야 합니다. 따라서 특정 패키지만 업그레이드를 하거나, 보안 업데이트만 해야 하는 경우가 발생하는데, 어떻게 그런 작업을 하는지 알아보겠습니다. 특정 ...

cat /etc/redhat-release # cat /etc/redhat-release CentOS Linux release 7.4.1708 (Core) cat /etc/*release* # cat /etc/*release* CentOS Linux release 7.4.1708 (Core) Derived from Red Hat Enterprise Linux 7.4 (Source) NAME="CentOS Linux" VERSION="7 (Core)" ID="centos" ID_LIKE="rhel fedora" VERSION_ID="7" PRETTY_NAME="CentOS Linux 7 (Core)" ANSI_COLOR="0;31" CPE_NAME="cpe:/o:centos:centos:7" HOME_URL="https://www.centos.org/" BUG_REPORT_URL="https://bugs.centos.org/" CENTOS_MANTISBT_PROJECT="CentOS-7" CENTOS_MANTISBT_PROJECT_VERSION="7" REDHAT_SUPPORT_PRODUCT="centos" REDHAT_SUPPORT_PRODUCT_VERSION="7" CentOS Linux release 7.4.1708 (Core) CentOS Linux release 7.4.1708 (Core) cpe:/o:centos:centos:7
CentOS 7 / firewall-cmd 명령어로 방화벽 관리하기
CentOS의 방화벽 관리 데몬은 firewalld입니다. 설정은 firewall-cmd 명령어로 합니다. 방화벽 실행 여부 확인 firewall-cmd --state 실행 중이면 running, 실행 중이 아니면 not running을 출력합니다. 방화벽 다시 로드 firewall-cmd --reload 방화벽 설정 후 다시 로드해야 적용됩니다. 존(Zone) 출력하기 firewall-cmd --get-zones 존(zone) 목록을 출력합니다. firewall-cmd --get-default-zone 기본 존을 출력합니다. firewall-cmd --get-active-zones 활성화된 존을 출력합니다. 사용 가능한 서비스/포트 출력하기 firewall-cmd --list-all 사용 가능한 모든 서비스/포트 목록을 출력합니다. firewall-cmd --zone=public --list-all public 존에 ...
리눅스 / 명령어 / cal / 달력을 출력하는 명령어
cal은 달력을 출력하는 명령어이다. 아무 옵션 없이 사용하면 현재 날짜가 속한 달의 달력을 출력한다. cal October 2022 Su Mo Tu We Th Fr Sa 1 2 3 4 5 ...
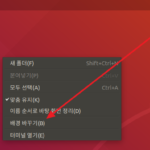
Ubuntu 18.04 Desktop에서 해상도 변경하는 방법입니다. 바탕화면에서 마우스 우클릭을 합니다. 를 클릭합니다. 왼쪽 메뉴에서 를 클릭합니다. 왼쪽 메뉴에서 를 클릭하고, 오른쪽에서 해상도를 선택합니다. 오른쪽 위의 버튼을 클릭합니다. 를 클릭합니다.