Ubuntu 18.04 Server / apt / 패키지 설치, 삭제, 업그레이드하는 명령어
Ubuntu에서 패키지를 관리하는 명령어는 여러 가지가 있습니다. 그 중 널리 사용되는 것은 apt-get과 apt입니다. 아래는 apt를 이용하여 패키지를 설치하고 삭제하고 업그레이드하는 방법입니다. 대부분의 경우 apt-get을 사용해도 작동합니다.
APT 사용법
- 패키지 목록을 갱신합니다
# apt update
- 모든 패키지를 최신 버전으로 업그레이드합니다.
# apt upgrade
- abc 패키지를 설치합니다. 의존성있는 패키지도 함께 설치합니다.
# apt install abc
- abc 패키지를 삭제합니다. 설정 파일 등은 삭제하지 않습니다.
# apt remove abc
- 더 이상 필요 없는 패키지들을 삭제합니다.
# apt autoremove
- 설정 파일 등도 포함하여 abc 패키지를 삭제합니다.
# apt purge abc
- abc와 관련된 패키지를 검색합니다.
# apt search abc
- abc 패키지의 정보를 출력합니다.
# apt show abc
- 패키지 목록을 출력합니다.
# apt list
- 설치된 패키지 목록을 출력합니다.
# apt list --installed
- 업그레이드 가능한 패키지 목록을 출력합니다.
# apt list --upgradable
- 도움말을 출력합니다.
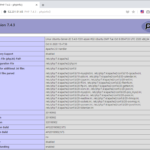
# apt --help
apt 1.6.12 (amd64)
Usage: apt [options] command

apt is a commandline package manager and provides commands for
searching and managing as well as querying information about packages.
It provides the same functionality as the specialized APT tools,
like apt-get and apt-cache, but enables options more suitable for
interactive use by default.

Most used commands:
  list - list packages based on package names
  search - search in package descriptions
  show - show package details
  install - install packages
  remove - remove packages
  autoremove - Remove automatically all unused packages
  update - update list of available packages
  upgrade - upgrade the system by installing/upgrading packages
  full-upgrade - upgrade the system by removing/installing/upgrading packages
  edit-sources - edit the source information file

See apt(8) for more information about the available commands.
Configuration options and syntax is detailed in apt.conf(5).
Information about how to configure sources can be found in sources.list(5).
Package and version choices can be expressed via apt_preferences(5).
Security details are available in apt-secure(8).
                                        This APT has Super Cow Powers.
저장소 변경하는 방법
우분투에서 패키지를 업데이트 하거나 설치하면, 미러 서버에서 소프트웨어를 다운로드하여 설치합니다. 그런데, 그 미러 서버가 멀리 있거나 속도가 느리다면, 패키지를 다운로드하는데 많은 시간이 소요됩니다. 속도가 너무 느려서 불편하다면 저장소를 지정하여 속도를 빠르게 할 수 있습니다.
저장소 설정은 /etc/apt/sources.list에서 합니다. 파일을 텍스트 에디터로 열고
http://archive.ubuntu.com/ubuntu
를 모두 변경합니다. 만약 한국이라면
http://mirror.kakao.com/ubuntu
으로 바꿔보세요.
참고로, 지역별 우분투 미러 서버 리스트는 여기서 확인할 수 있습니다.
Ubuntu 16.04 / phpMyAdmin / 특정 IP에서만 접속 가능하게 만드는 방법
우분투 16.04에서 phpMyAdmin을 패키지로 설치했을 때, 기본 설정은 모든 IP에서 접속 가능입니다. 만약 특정 IP에서만 접속 가능하게 하려면 /etc/apache2/conf-available/phpmyadmin.conf에 다음 코드를 추가합니다. <Directory /usr/share/phpmyadmin> Order deny,allow Deny from all Allow from xxx.xxx.xxx.xxx </Directory> xxx.xxx.xxx.xxx는 접속하려는 IP로 바꿉니다. 여러 IP를 설정하고 싶을 때는 띄어쓰기로 구분합니다. <Directory /usr/share/phpmyadmin> Order deny,allow Deny from all ...
Ubuntu 16.04 Server / PHP / 메모리 늘리는 방법
PHP 설정은 php.ini에서 한다. Ubuntu 16.04에서 php.ini의 위치는 /etc/php/7.0/apache2/php.ini 이다. PHP 버전에 따라 7.0은 다른 숫자일 수 있다. 메모리를 늘리기 위해 수정해야 할 것은 memory_limit이다. 기본값은 128M이다. 128을 적절히 변경한다. memory_limit = 128M 변경한 설정이 적용되도록 하려면 웹서버를 다시 시작하거나 다시 로드한다. Apache 웹서버라면 다음과 같이 명령하여 다시 시작할 수 있고, # service apache2 restart 다음과 같이 ...
현재 언어 확인하기 locale 명령어로 현재 언어를 확인할 수 있다. # locale LANG=en_US.UTF-8 LANGUAGE= LC_CTYPE="en_US.UTF-8" LC_NUMERIC="en_US.UTF-8" LC_TIME="en_US.UTF-8" LC_COLLATE="en_US.UTF-8" LC_MONETARY="en_US.UTF-8" LC_MESSAGES="en_US.UTF-8" LC_PAPER="en_US.UTF-8" LC_NAME="en_US.UTF-8" LC_ADDRESS="en_US.UTF-8" LC_TELEPHONE="en_US.UTF-8" LC_MEASUREMENT="en_US.UTF-8" LC_IDENTIFICATION="en_US.UTF-8" LC_ALL= 언어 추가하기 사용 가능한 언어는 locale -a로 확인할 수 있다. # locale -a C C.utf8 en_US.utf8 POSIX 예를 들어 한국어를 추가하고 싶다면 아래와 같이 명령한다. # apt install language-pack-ko locale -a로 설치 확인을 한다. # locale -a C C.utf8 en_US.utf8 ko_KR.utf8 POSIX 언어 변경하기 다음과 같이 명령하면 사용하는 언어가 한국어로 바뀐다. update-locale LANG=ko_KR.utf8 로그아웃 후 다시 로그인하거나, 컴퓨터를 다시 시작하면 ...
Ubuntu 18.04 Server / apt / 패키지 설치, 삭제, 업그레이드하는 명령어
Ubuntu에서 패키지를 관리하는 명령어는 여러 가지가 있습니다. 그 중 널리 사용되는 것은 apt-get과 apt입니다. 아래는 apt를 이용하여 패키지를 설치하고 삭제하고 업그레이드하는 방법입니다. 대부분의 경우 apt-get을 사용해도 작동합니다. APT 사용법 패키지 목록을 갱신합니다 # apt update 모든 패키지를 최신 버전으로 업그레이드합니다. # apt upgrade abc 패키지를 설치합니다. 의존성있는 패키지도 함께 설치합니다. # apt install abc abc 패키지를 삭제합니다. 설정 ...
Ubuntu 20.04 Desktop 설치하려는 글꼴을 더블 클릭하거나, 글꼴 선택 후 엔터키를 누르거나, 마우스 우클릭 후 를 클릭합니다. 상단에 있는 를 클릭합니다. 설치가 완료되면 으로 바뀝니다. 글꼴이 잘 설치되었는지 확인합니다.
ODD가 없는 컴퓨터에 OS를 설치하는 방법은 두가지입니다. 첫번째는 휴대용 ODD를 이용하는 것이고, 두번째는 USB에 설치 파일을 넣어서 이용하는 것입니다. 두번째 방법이 간편하기는 하지만 설치용 USB를 만드는 게 좀 번거롭습니다. 하지만, 우분투(Ubuntu) 설치용 USB는 몇 번의 클릭으로 쉽게 만들 수 있습니다. 우분투 다운로드 원하는 우분투 버전을 다운로드 받습니다. Universal USB Installer 다운로드 다음의 링크에서 Universal USB Installer를 다운로드 ...
Ubuntu 24.04 Server / 고정 IP 설정하는 방법
네트워크 설정 파일은 /etc/netplan 디렉토리 안에 있는 yaml 파일입니다. 파일 이름은 시스템마다 다를 수 있습니다. # ll /etc/netplan total 12 drwxr-xr-x 2 root root 4096 Apr 27 23:00 ./ drwxr-xr-x 108 root root 4096 Apr 27 23:06 ../ -rw------- 1 root root 389 Apr 27 23:00 50-cloud-init.yaml DHCP라면 설정 파일이 다음과 ...
Ubuntu 22.04 Server / 백신 프로그램 ClamAV 설치 및 사용법
ClamAV ClamAV는 리눅스에서 사용할 수 있는 백신 프로그램이다. 우분투 패키지에 포함되어 있으므로 apt 명령으로 쉽게 설치하고 사용할 수 있다. 설치 # apt install clamav 사용법 데이터베이스 업데이트 clamav-freshclam 서비스를 중지한다. # systemctl stop clamav-freshclam freshclam 명령으로 업데이트한다. # freshclam clamav-freshclam 서비스를 시작한다. # systemctl start clamav-freshclam 검사 home 디렉토리와 그 하위 디렉토리를 검사한다. # clamscan -r /home 검사 결과는 다음처럼 나온다. ----------- SCAN SUMMARY ----------- Known viruses: ...
Ubuntu 20.04 Server / 고정 IP 설정하는 방법
네트워크 설정 파일은 /etc/netplan 디렉토리 안에 있는 yaml 파일이다. DHCP로 설치했다면, 설정 파일 내용은 다음과 비슷하게 되어 있다. # This is the network config written by 'subiquity' network: ethernets: enp0s3: dhcp4: true version: 2 다음과 같이 수정하고 저장한다. IP 등은 네트워크 환경에 맞게 적절히 ...
Ubuntu 22.04 Server / Apache, PHP, MariaDB 설치하는 방법
Ubuntu Server에 웹서버 Apache, 웹프로그래밍 언어 PHP, 데이터베이스 MariaDB를 설치하는 방법입니다. 웹서버 운영을 위한 최소한의 설치로, 실제로 서비스할 때는 더 많은 패키지가 필요할 수 있습니다. 설치 Apache, PHP, MariaDB를 설치합니다. php-mysql은 PHP와 MariaDB 연동을 위한 패키지입니다. # apt install apache2 mariadb-server php php-mysql MariaDB 설정 다음과 같이 명령하여 몇 가지 설정을 합니다. # mysql_secure_installation MariaDB의 root 계정 ...