Rocky Linux 10 / 방화벽 관리
Rocky Linux는 firewalld를 기본 방화벽으로 사용하며, firewall-cmd 명령어로 실시간 설정이 가능합니다. 포트나 서비스를 열고 닫거나, Zone을 통해 네트워크 접근을 세분화하여 관리할 수 있습니다. 설정은 일시적 또는 영구적으로 적용 가능합니다.
차례
방화벽 상태 확인
방화벽이 실행 중이면 running, 실행 중이 아니면 not running을 출력합니다.
# firewall-cmd --state방화벽 시작과 중지
방화벽을 시작합니다.
# systemctl start firewalld방화벽을 중지합니다.
# systemctl stop firewalld시스템 시작 시 방화벽이 자동으로 시작하도록 합니다.
# systemctl enable firewalld시스템 시작 시 방화벽이 자동으로 시작하지 않도록 합니다.
# systemctl disable firewalld열려 있는 서비스와 포트 확인
열려 있는 서비스를 출력합니다.
# firewall-cmd --list-services열려 있는 포트를 출력합니다.
# firewall-cmd --list-ports서비스 허용과 차단
임시 허용과 차단
http 서비스를 허용합니다.
# firewall-cmd --add-service=httphttp 서비스를 차단합니다.
# firewall-cmd --remove-service=http위와 같이 하면 바로 적용됩니다.
임시 정책이므로 firewalld 서비스를 reload, restart하거나 firewall-cmd --reload를 하면 허용 또는 차단이 해제됩니다.
영구 허용과 차단
http 서비스를 영구적으로 허용합니다.
# firewall-cmd --add-service=http --permanenthttp 서비스를 영구적으로 차단합니다.
# firewall-cmd --remove-service=http --permanent아래와 같이 명령해야 적용됩니다.
# firewall-cmd --reload서비스 목록
서비스 목록은 --get-services 옵션으로 볼 수 있습니다.
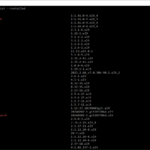
# firewall-cmd --get-services
0-AD RH-Satellite-6 RH-Satellite-6-capsule afp alvr amanda-client amanda-k5-client amqp amqps anno-1602 anno-1800 apcupsd aseqnet audit ausweisapp2 bacula bacula-client bareos-director bareos-filedaemon bareos-storage bb bgp bitcoin bitcoin-rpc bitcoin-testnet bitcoin-testnet-rpc bittorrent-lsd ceph ceph-exporter ceph-mon cfengine checkmk-agent civilization-iv civilization-v cockpit collectd condor-collector cratedb ctdb dds dds-multicast dds-unicast dhcp dhcpv6 dhcpv6-client distcc dns dns-over-quic dns-over-tls docker-registry docker-swarm dropbox-lansync elasticsearch etcd-client etcd-server factorio finger foreman foreman-proxy freeipa-4 freeipa-ldap freeipa-ldaps freeipa-replication freeipa-trust ftp galera ganglia-client ganglia-master git gpsd grafana gre high-availability http http3 https ident imap imaps iperf2 iperf3 ipfs ipp ipp-client ipsec irc ircs iscsi-target isns jenkins kadmin kdeconnect kerberos kibana klogin kpasswd kprop kshell kube-api kube-apiserver kube-control-plane kube-control-plane-secure kube-controller-manager kube-controller-manager-secure kube-nodeport-services kube-scheduler kube-scheduler-secure kube-worker kubelet kubelet-readonly kubelet-worker ldap ldaps libvirt libvirt-tls lightning-network llmnr llmnr-client llmnr-tcp llmnr-udp managesieve matrix mdns memcache minecraft minidlna mndp mongodb mosh mountd mpd mqtt mqtt-tls ms-wbt mssql murmur mysql nbd nebula need-for-speed-most-wanted netbios-ns netdata-dashboard nfs nfs3 nmea-0183 nrpe ntp nut opentelemetry openvpn ovirt-imageio ovirt-storageconsole ovirt-vmconsole plex pmcd pmproxy pmwebapi pmwebapis pop3 pop3s postgresql privoxy prometheus prometheus-node-exporter proxy-dhcp ps2link ps3netsrv ptp pulseaudio puppetmaster quassel radius radsec rdp redis redis-sentinel rootd rpc-bind rquotad rsh rsyncd rtsp salt-master samba samba-client samba-dc sane settlers-history-collection sip sips slimevr slp smtp smtp-submission smtps snmp snmptls snmptls-trap snmptrap spideroak-lansync spotify-sync squid ssdp ssh statsrv steam-lan-transfer steam-streaming stellaris stronghold-crusader stun stuns submission supertuxkart svdrp svn syncthing syncthing-gui syncthing-relay synergy syscomlan syslog syslog-tls telnet tentacle terraria tftp tile38 tinc tor-socks transmission-client turn turns upnp-client vdsm vnc-server vrrp warpinator wbem-http wbem-https wireguard ws-discovery ws-discovery-client ws-discovery-host ws-discovery-tcp ws-discovery-udp wsman wsmans xdmcp xmpp-bosh xmpp-client xmpp-local xmpp-server zabbix-agent zabbix-java-gateway zabbix-server zabbix-trapper zabbix-web-service zero-k zerotier
특정 서비스에 대한 자세한 정보는 다음과 같은 방식으로 볼 수 있습니다.
# firewall-cmd --info-service=http
http
  ports: 80/tcp
  protocols:
  source-ports:
  modules:
  destination:
  includes:
  helpers:
포트 허용과 차단
임시 허용과 차단
80 TCP 포트를 허용합니다.
# firewall-cmd --add-port=80/tcp80 TCP 포트를 차단합니다.
# firewall-cmd --remove-port=80/tcp위와 같이 하면 바로 적용됩니다.
임시 정책이므로 firewalld 서비스를 reload, restart하거나 firewall-cmd --reload를 하면 허용 또는 차단이 해제됩니다.
영구 허용과 차단
80 TCP 포트를 영구적으로 허용합니다.
# firewall-cmd --add-port=80/tcp --permanenthttp 서비스를 영구적으로 차단합니다.
# firewall-cmd --remove-port=80/tcp --permanent아래와 같이 명령해야 적용됩니다.
# firewall-cmd --reload특정 IP 차단
192.168.1.178에서의 접속을 차단합니다.
# firewall-cmd --add-rich-rule='rule family="ipv4" source address="192.168.1.178" drop'차단한 것을 제거합니다.
# firewall-cmd --remove-rich-rule='rule family="ipv4" source address="192.168.1.178" drop'영구 차단하고 싶다면 --permanent 옵션을 붙이고, 다시 로드합니다.
# firewall-cmd --add-rich-rule='rule family="ipv4" source address="192.168.1.178" drop' --permanent
# firewall-cmd --reload


