Rocky Linux 9 / Apache, PHP, MariaDB 설치
Apache
설치
- Apache를 설치합니다. 패키지 이름은 httpd입니다.
# dnf install httpd
- httpd 서비스를 시작한다.
# systemctl start httpd
시스템 재부팅 후에도 자동으로 시작되게 하고 싶다면 다음과 같이 명령합니다.
# systemctl enable httpd
방화벽 설정
- http 서비스(80 포트)를 영구적으로 엽니다.
# firewall-cmd --permanent --add-service=http
- https 서비스(443 포트)를 영구적으로 연다.
# firewall-cmd --permanent --add-service=https
- 방화벽을 다시 로드해야 방화벽 설정이 반영됩니다.
# firewall-cmd --reload
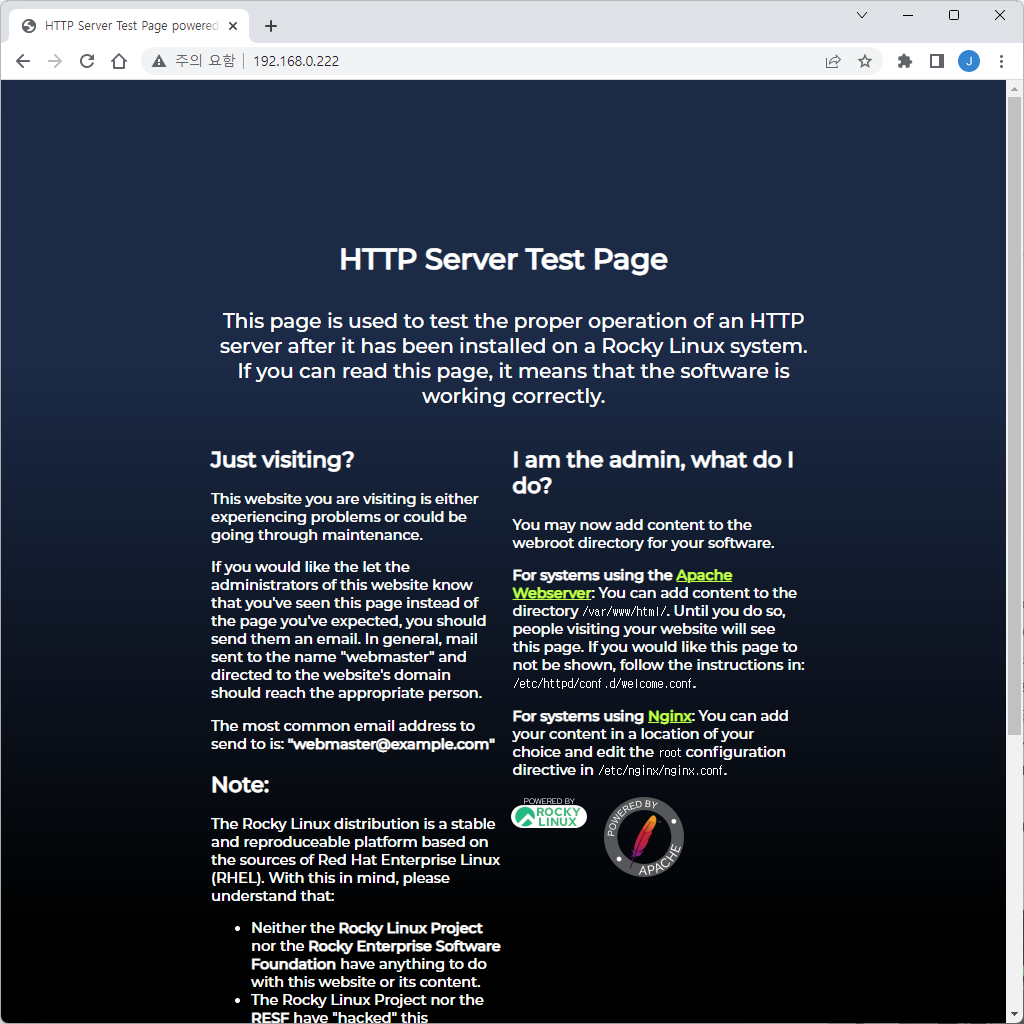
테스트
- 웹브라우저로 서버 IP에 접속한다. 다음과 같이 나오면 제대로 설치되고 서비스가 시작된 것입니다.
PHP
설치
- PHP를 설치합니다.
# dnf install php
- Apache를 다시 시작합니다.
# systemctl restart httpd
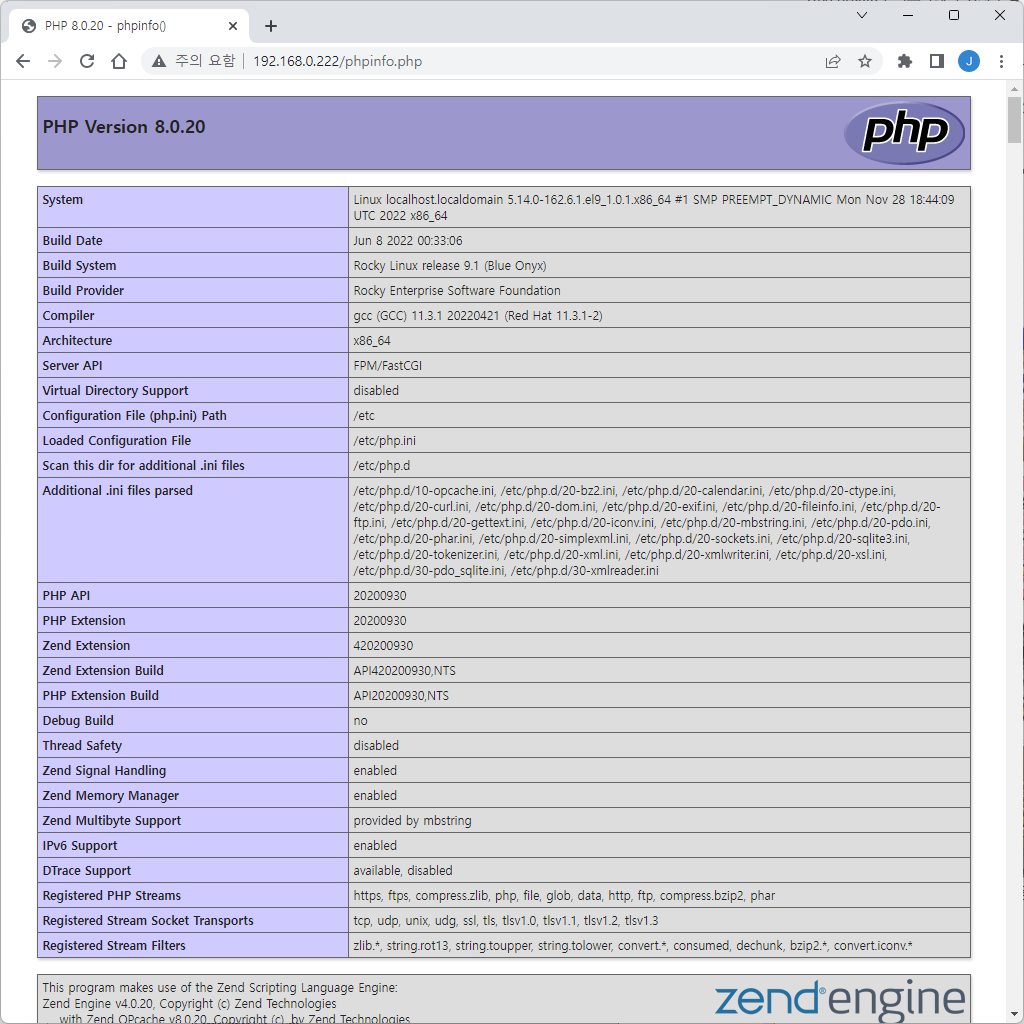
테스트
- /var/www/html/ 디렉토리에 다음의 내용을 가진 파일을 만들고, phpinfo.php라는 이름으로 저장합니다.
<?php
  phpinfo();
?>
- http://<server-ip>/phpinfo.php로 접속했을 때 다음과 같이 나오면 PHP가 제대로 설치된 것입니다.
MaraiDB
설치
- MariaDB를 설치한다. 패키지 이름은 mariadb-server입니다.
# dnf install mariadb-server
- 서비스를 시작합니다. 서비스 이름은 mariadb입니다.
# systemctl start mariadb
시스템 재부팅 후에도 자동으로 시작되게 하고 싶다면 다음과 같이 명령합니다.
# systemctl enable mariadb
기본 설정
- 다음과 같이 명령하여 관리자 비밀번호를 만드는 등 몇 가지 설정을 합니다.
# mysql_secure_installation
- 어떻게 설정해야 할지 모르겠다면, 기본값으로 진행합니다. 과정은 다음과 같습니다.
NOTE: RUNNING ALL PARTS OF THIS SCRIPT IS RECOMMENDED FOR ALL MariaDB
      SERVERS IN PRODUCTION USE!  PLEASE READ EACH STEP CAREFULLY!

In order to log into MariaDB to secure it, we'll need the current
password for the root user. If you've just installed MariaDB, and
haven't set the root password yet, you should just press enter here.

Enter current password for root (enter for none):
OK, successfully used password, moving on...

Setting the root password or using the unix_socket ensures that nobody
can log into the MariaDB root user without the proper authorisation.

You already have your root account protected, so you can safely answer 'n'.

Switch to unix_socket authentication [Y/n]
Enabled successfully!
Reloading privilege tables..
 ... Success!

You already have your root account protected, so you can safely answer 'n'.

Change the root password? [Y/n]
New password:
Re-enter new password:
Password updated successfully!
Reloading privilege tables..
 ... Success!

By default, a MariaDB installation has an anonymous user, allowing anyone
to log into MariaDB without having to have a user account created for
them.  This is intended only for testing, and to make the installation
go a bit smoother.  You should remove them before moving into a
production environment.

Remove anonymous users? [Y/n]
 ... Success!

Normally, root should only be allowed to connect from 'localhost'.  This
ensures that someone cannot guess at the root password from the network.

Disallow root login remotely? [Y/n]
 ... Success!

By default, MariaDB comes with a database named 'test' that anyone can
access.  This is also intended only for testing, and should be removed
before moving into a production environment.

Remove test database and access to it? [Y/n]
 - Dropping test database...
 ... Success!
 - Removing privileges on test database...
 ... Success!

Reloading the privilege tables will ensure that all changes made so far
will take effect immediately.

Reload privilege tables now? [Y/n]
 ... Success!

Cleaning up...

All done!  If you've completed all of the above steps, your MariaDB
installation should now be secure.

Thanks for using MariaDB!

Rocky Linux 9 / Apache / Virtulahost 만드는 방법
하나의 서버에서 여러 사이트를 운영할 수 있다. Rocky Linux 9에서 Apache 웹서버로 구현하는 방법을 정리한다. Selinux가 활성화되어 있으면 작동하지 않고, 별도의 설정이 필요하다. 여기서는 Selinux를 끄고 진행한다. 목표 하나의 서버에서 두 개의 사이트를 운영한다. http://aaa.manualfactory.net로 접속하면 Welcome to AAA!, http://bbb.manualfactory.net으로 접속하면 Welcome to BBB!를 출력한다. DNS 설정 aaa.manualfactory.net. bbb.manualfactory.net 모두 같은 IP로 가도록 설정한다. 폴더와 파일 생성 /home/aaa ...
Rocky Linux 8 / 원격 데스크톱으로 연결하는 방법
패키지 설치 다음과 같이 명령하여 EPEL(Extra Packages of Enterprise Linux) 저장소를 추가한다. dnf install epel-release xrdp 패키지를 설치한다. dnf install xrdp 방화벽 설정 원격 데스크톱이 사용하는 포트는 3389이다. firewall-cmd로 3389 포트를 열어준다. firewall-cmd --permanent --add-port=3389/tcp 방화벽을 다시 로드한다. firewall-cmd --reload 서비스 설정 systemctl 명령어로 xrdp 서비스를 시작한다. systemctl start xrdp 시스템 재부팅 후에도 자동으로 실행되게 하려면 다음과 같이 명령한다. systemctl enable xrdp 재부팅 위와 같이 했을 때 원격 ...
상태 확인 켜진 상태라면 Enforcing, 꺼진 상태라면 Permissive를 출력한다. getenforce 방법 1 다음과 같이 명령하면 SELinux가 꺼진다. 재부팅하면 다시 SELinux가 켜진다. setenforce 0 만약 다시 SELinux를 사용하고 싶다면 다음과 같이 명령한다. setenforce 1 방법 2 /etc/selinux/config에 다음과 같은 코드가 있다. SELINUX=enforcing 다음과 같이 바꾼다. SELINUX=disabled 시스템을 재부팅하면 적용된다. 방법 1과는 달리 재부팅해도 설정이 유지된다.
Rocky Linux 9 / Apache, PHP, MariaDB 설치
Rocky Linux 9에 Apache, PHP, MariaDB를 설치하는 방법을 정리합니다.
다운로드 아래 링크에서 ISO 파일을 다운로드한다. https://rockylinux.org/download Boot, Minimal, DVD 세 가지가 있는데, 다음과 같이 설명되어 있다. Boot Used to install the operating system from another source (such as a HTTP repository of the binary files). Can also be used to enter Rescue Mode. Minimal Used to install the operating system from another source (such as a ...
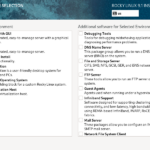
dnf는 패키지를 관리하는 명령어이다. 도움말 도움말 보기 # dnf -h 목록 보기 패키지 목록 보기 # dnf list 그룹 목록 보기 # dnf grouplist 검색 zip을 키워드로 패키지 검색 # dnf search zip 정보 출력 zip 패키지 정보 출력 # dnf info zip Server with GUI 그룹 정보 출력 # dnf groupinfo 'Server with GUI' 설치 zip 패키지 설치 # dnf install zip httpd와 php 설치 # dnf install httpd php Server ...
Rocky Linux 8 / root 계정으로 ssh 접속 가능하게 설정하는 방법
Rocky Linux를 설치할 때 가능하게 설정하지 않았다면, root 계정으로 ssh 접속을 할 수 없다. 보안 상 권장되는 설정이나, 테스트나 공부 목적 등으로 root 계정으로 ssh 접속하는 게 더 좋은 상황이라면, 다음과 같이 하여 접속을 허용할 수 있다. vi나 nano 같은 텍스트 에디터로 /etc/ssh/sshd_config 파일을 연다. 제일 밑에 다음 코드를 추가하고, 저장한다. PermitRootLogin yes 다음과 같이 ...

Rocky Linux 9 / hostname 변경하는 방법
CLI 다음과 같이 명령하면 hostname을 출력한다. hostname 다음과 같이 명령하면 hostname을 rocky로 변경한다. hostnamectl set-hostname rocky GUI 의 Device Name에서 변경한다.
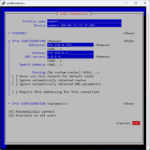
보통 Rocky Linux를 설치할 때 IP를 설정하나, 여러 가지 이유로 IP 설정을 다시 해야 하는 경우가 있다. IP를 설정하는 두 가지 방법을 소개한다. TUI 네트워크 설정 파일을 수정하는 것보다는 NetworkManager Text User Interface(nmtui)를 이용하는 게 편하다. nmtui를 실행한다. Edit a connection을 선택한다. 설정하려는 네트워크 카드를 선택한다. 현재 설정이 나오는데... 적절히 설정한다. 다음과 같이 명령하여 반영한다. systemctl restart NetworkManager GUI Settings를 연다. Network에서 ...
Rocky Linux 9 / SSH / 포트 변경하는 방법
SSH는 22 포트를 사용한다. 알려진 포트이므로 다른 포트로 변경하는 것이 보안상 좋다. Rocky Linux 9에서 SSH 포트 변경하는 방법은 다음과 같다. 포트를 1980으로 바꾼다고 가정한다. /etc/ssh/sshd_config에서 다음의 코드를... #Port 22 다음으로 변경한다. Port 1980 SELINUX가 활성화되어 있다면 다음과 같이 명령하여 1980 포트를 사용할 수 있게 만든다. semanage port -a -t ssh_port_t -p tcp 1980 만약 다음과 같은 ...