OBS Studio / What It Does and How to Get Started
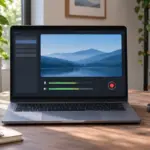
OBS Studio is a free, open-source app that combines screen, camera, and audio inputs for video recording or livestreaming. It runs on Windows, macOS, and Linux. For your first session, start with one video source and the audio you need, then play back a short recording.
What you can do with OBS Studio
Record a walkthrough, lesson, or game to a local file. You can record without a streaming account and play or edit the file later.
Livestreaming sends the video and audio you assemble in OBS to a streaming service in real time. Connect the service and check microphone level and layout before going live.
A scene is a layout. A source is an input in that layout. For example, you can put slides and a small webcam in one scene and make another scene for the full-screen camera, then switch between them.
Official OBS help and licensing FAQ
Choose a source for what you want to show
- Use Display Capture to show an entire monitor. It works well for switching between programs, but notifications and other windows on that display can also appear.
- Use Window Capture for a single program window. On recent macOS releases, the macOS Screen Capture source offers separate modes for a display, window, or application.
- For a game on Windows, try Game Capture first. If the game does not appear, try Window Capture with the game in windowed mode or check the layout using Display Capture.
- To add a webcam or capture card, use the available video capture device source. For a small face camera, place the webcam source above the screen source and resize it.
Official OBS guide to scenes and sources
Install OBS and check your first recording
- Install the build for your operating system from the official site. In the setup wizard, optimize for recording if you need a local file or for streaming if you mainly want to go live.
- Create a scene and click + in Sources to add the input you need. Check the captured area and layout in the preview.
- Speak or play the sound you want and check that the corresponding meter moves in the Audio Mixer. Mute inputs you do not want included.
- Click Start Recording and stop after a few seconds. Open File → Show Recordings and play the new file to verify picture and sound.
OBS Studio installation and initial setup by operating system
Official OBS Quick Start Guide
How to record your entire screen with OBS
Crop the capture or troubleshoot a source
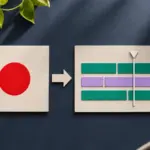
To keep only part of a display, add the Crop/Pad filter to the source and choose how many pixels to remove from its edges. The filter affects every scene that shares the source. To crop it in just one scene, crop that source instance using its transform.
Official OBS Crop/Pad filter guide
If Window Capture shows black, check the target window again. On Windows, try another capture method in the source properties. On macOS, check screen recording permissions for OBS. Compare the preview and restore the previous method if the change does not help.
Official OBS guide to Window Capture
For editing in Premiere Pro, record a short file in your intended format before a long session. Confirm that the editor can import both picture and audio, then choose the recording format and encoder for your editing workflow.